Introduction
The Field Group Configuration Page allows you to create and manage field groups. On this page, you can create new field groups, add or edit fields, and organize them to streamline the document automation process.
Now we will show you how can you create and configurate your own Field Groups.
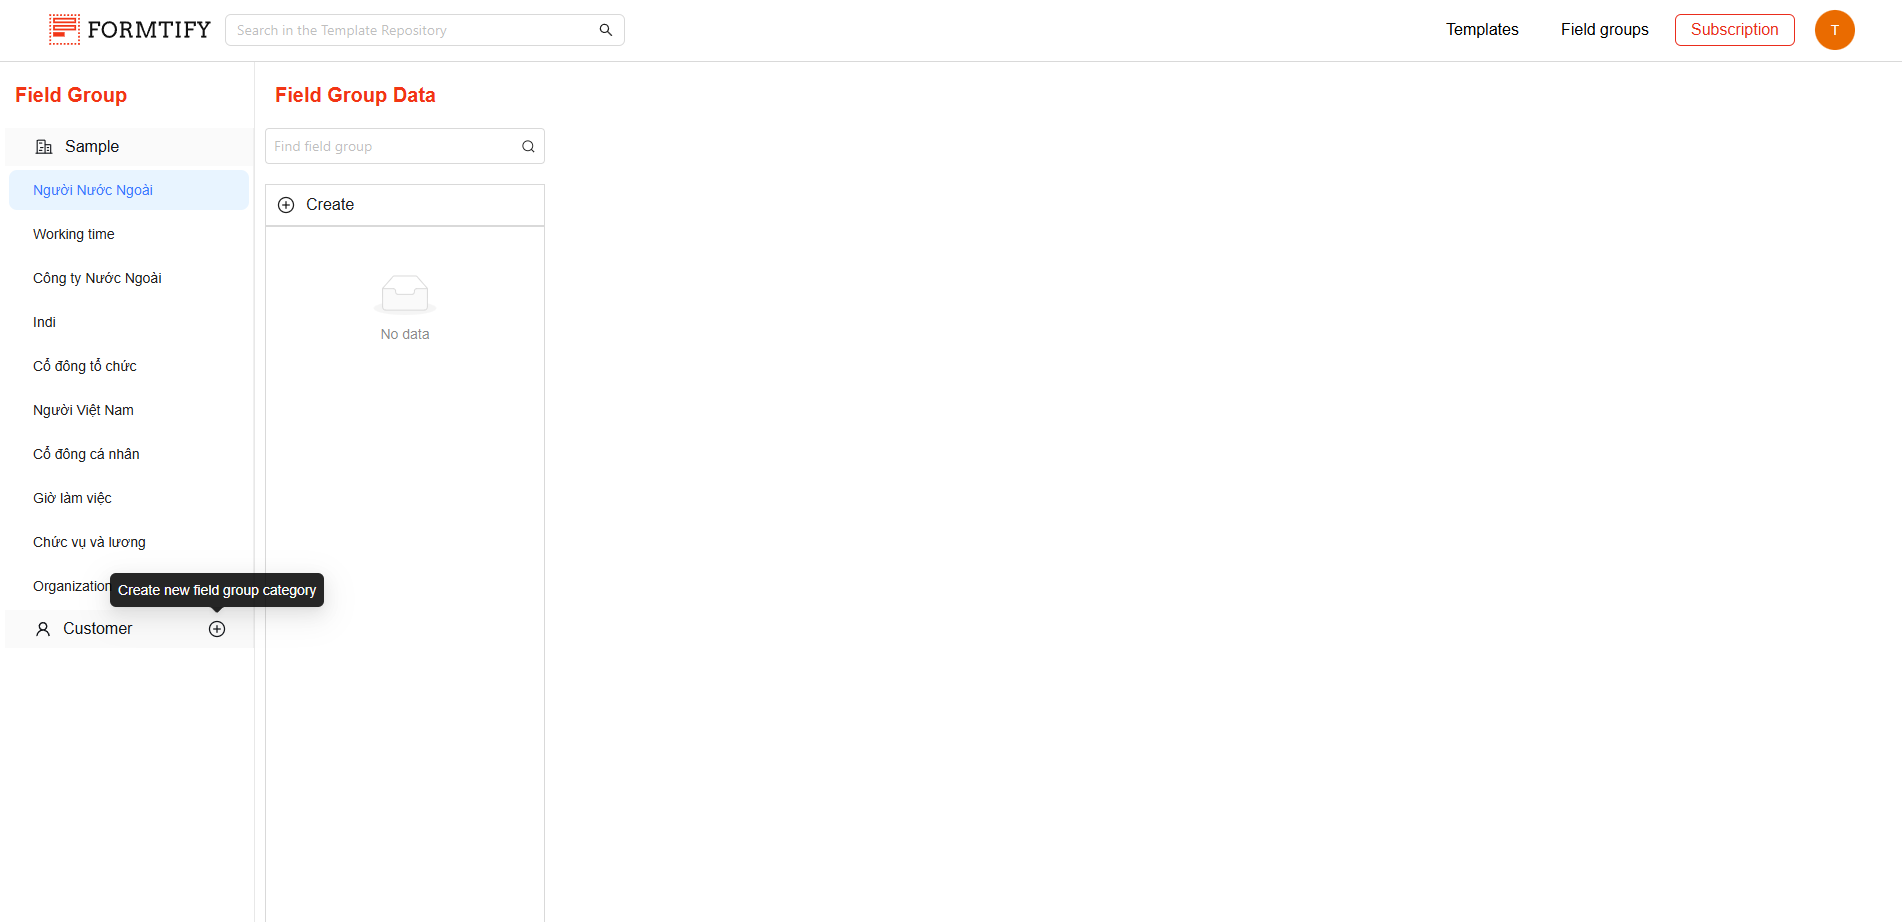
Step 1: Access Field Group Configuration Page
- Click the “+” icon next to Customer at the Field Group page.
Step 2: Create new Field Group
- Enter the Field Group Name to define the group.
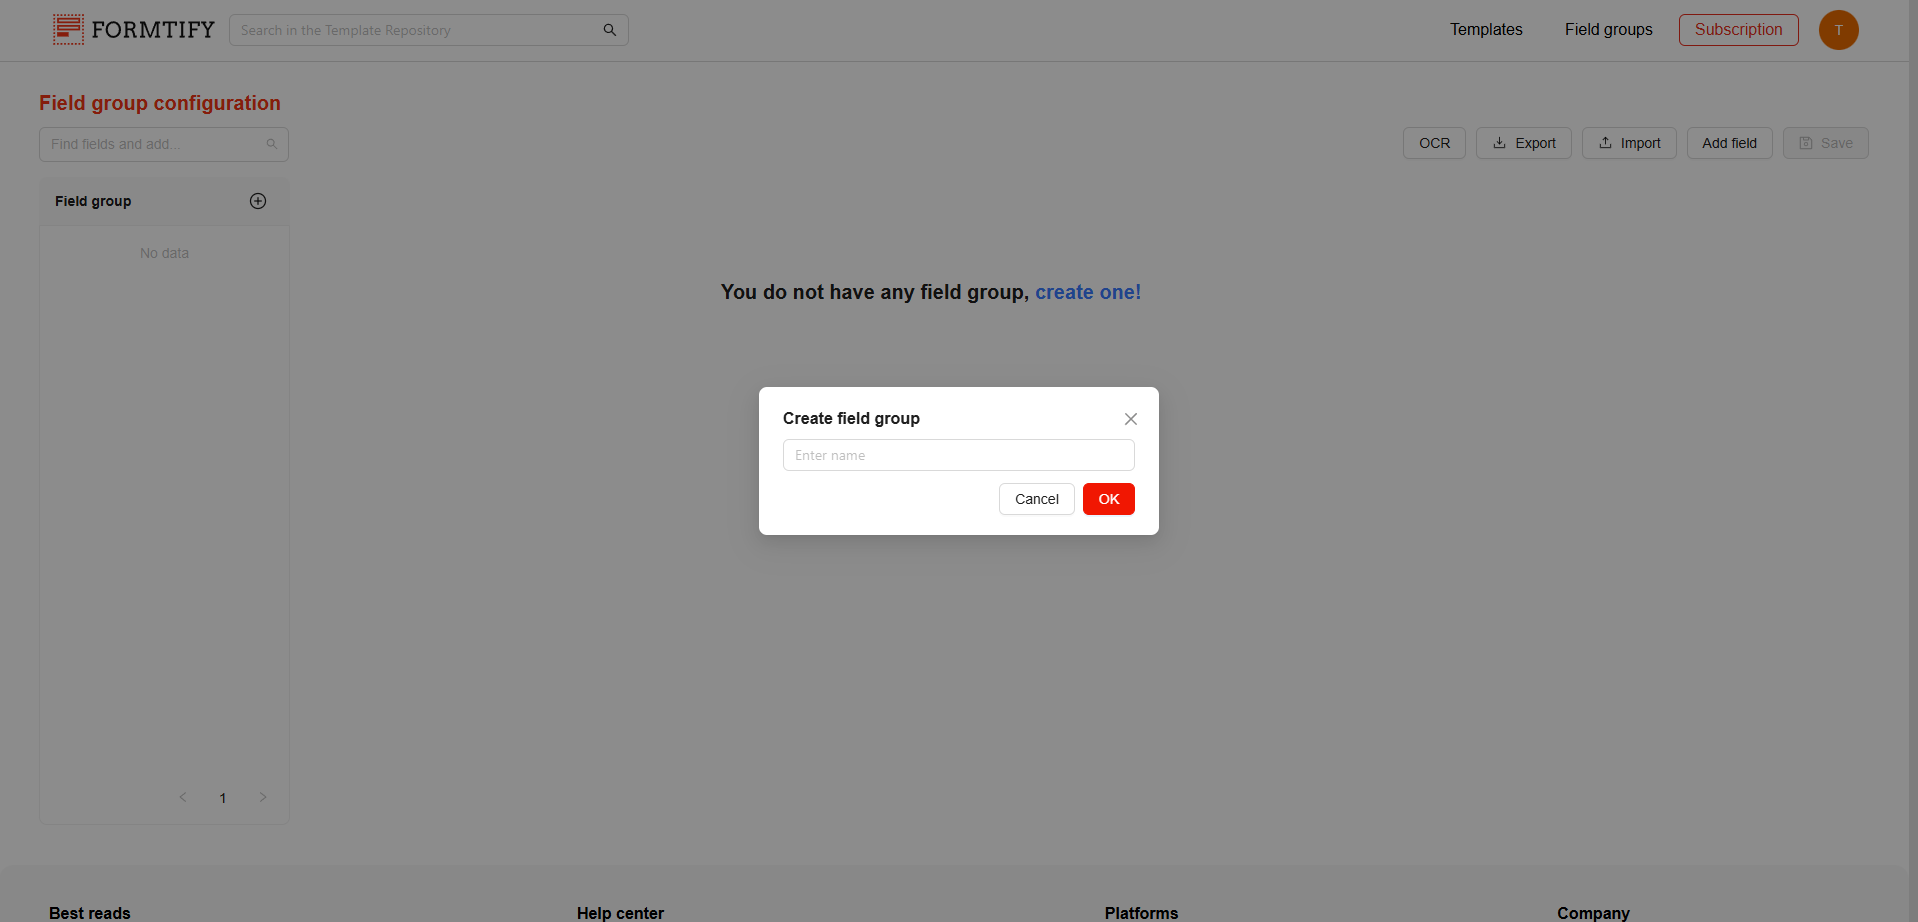
- Click the “+” icon or create one if you don’t have any Field Group.
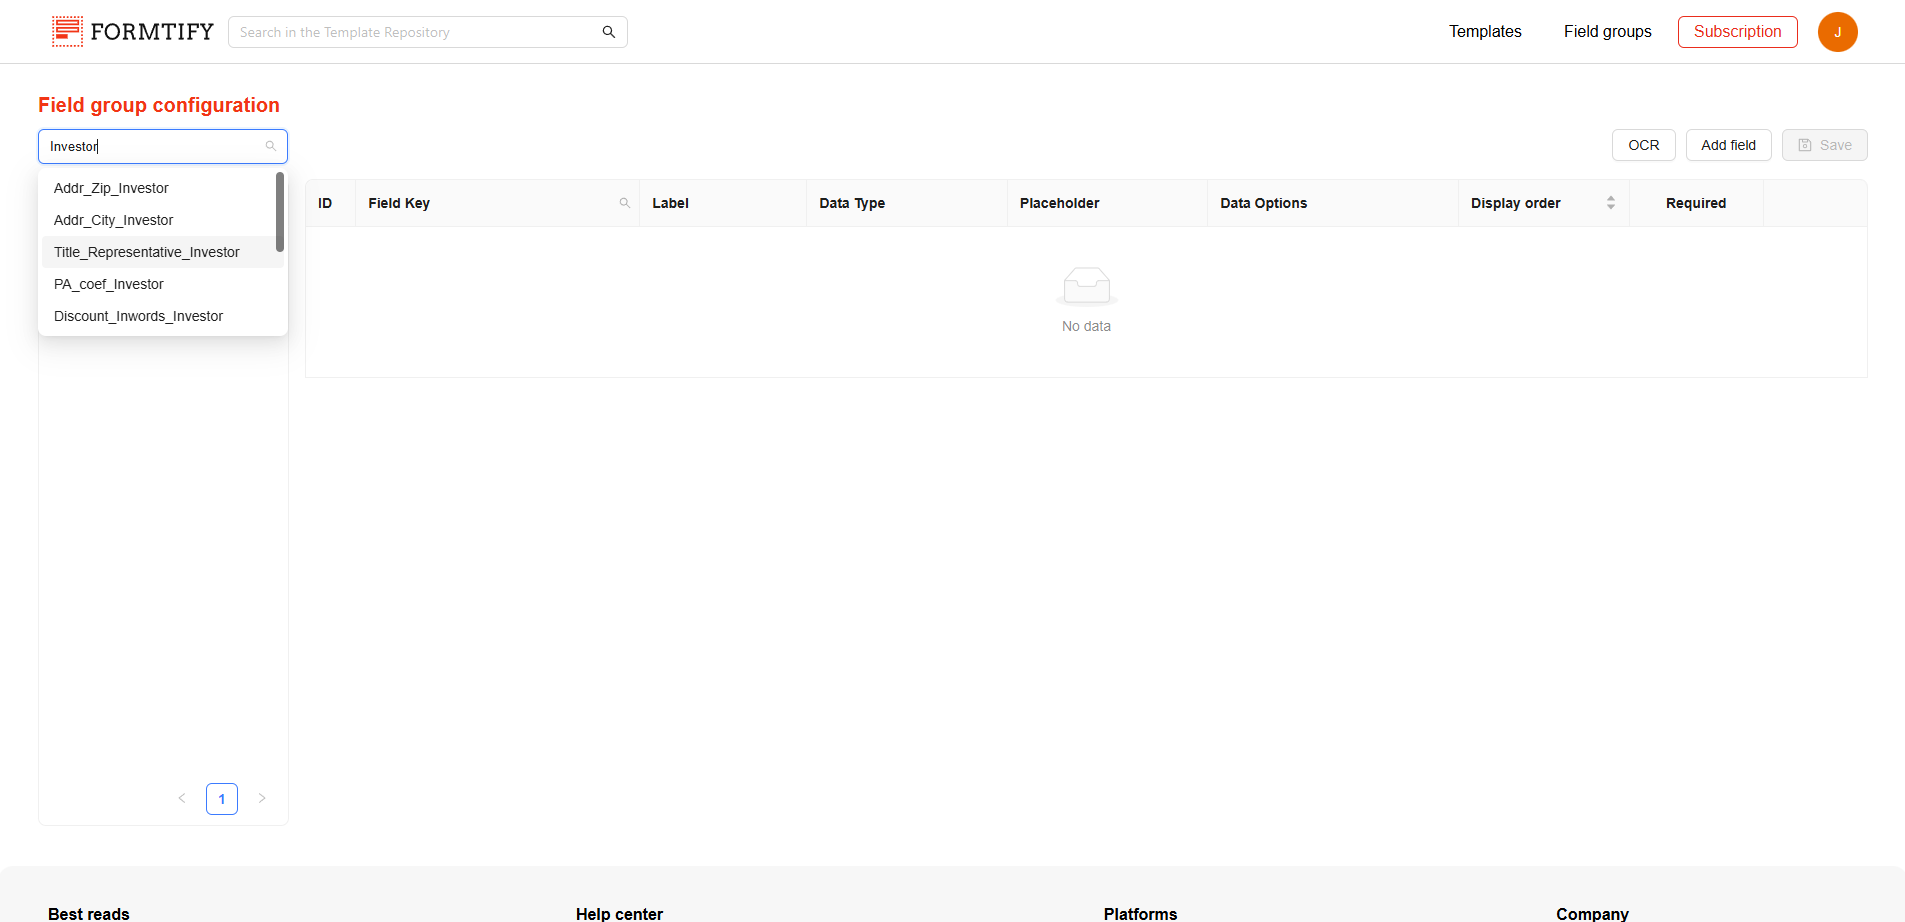
Step 3: Add new Fields to the Field Group
- If no templates have been uploaded, no fields will be available to add. In this case:
- Click the Add Field button to create a new Field manually.
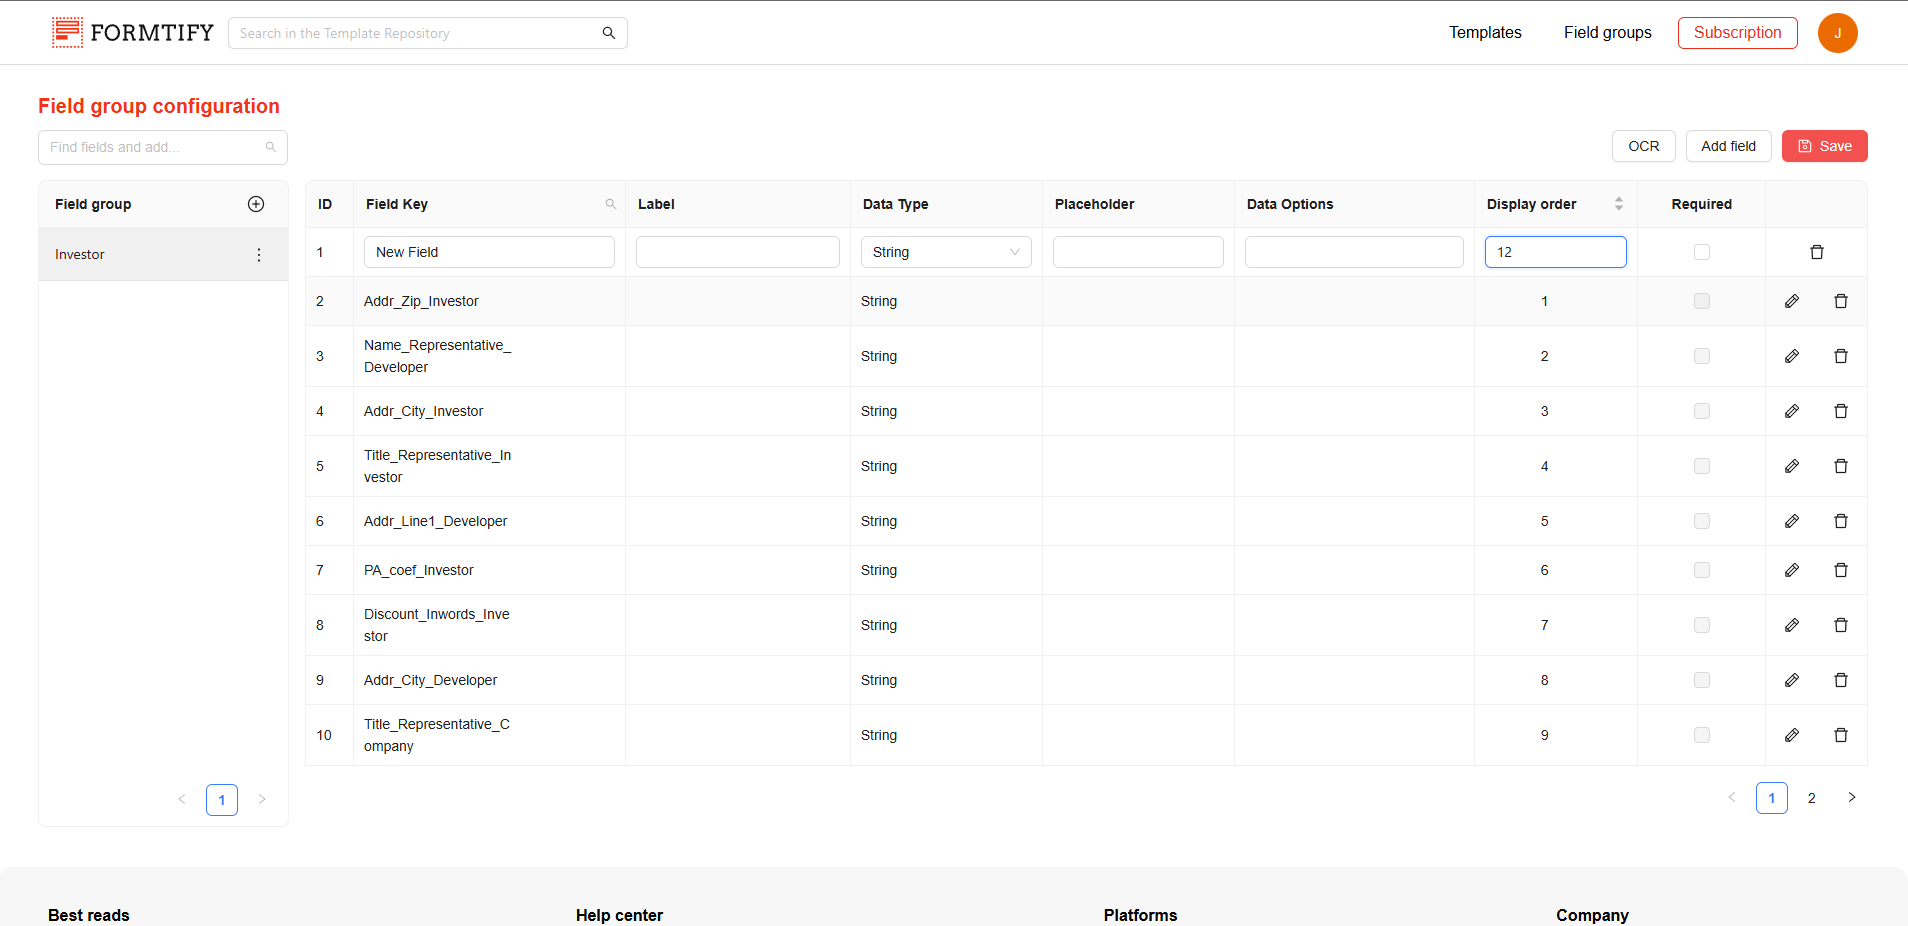
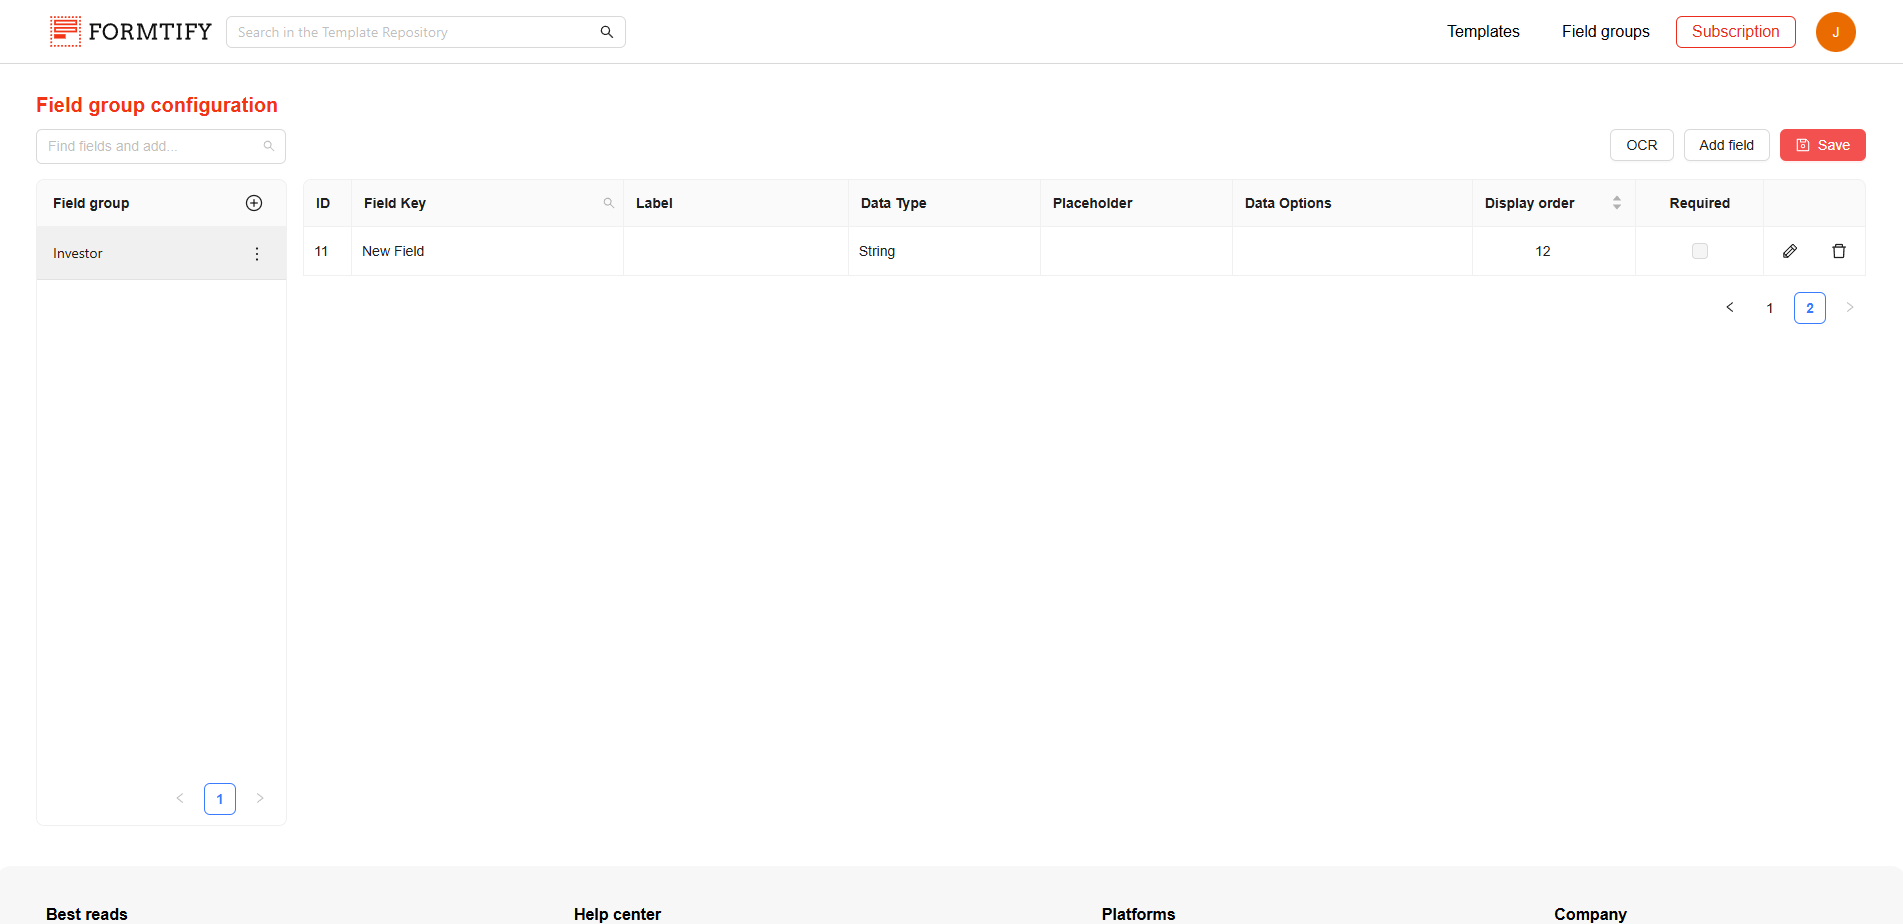
- Click the Add Field button to create a new Field manually.
- Search for Fields using the Field Key and click them to add them to your Field Group.

Step 4: Configure your Fields properties.
- Configure the properties of the fields you’ve added to the group.
- Read Field articles to understand more about field properties to set it up correctly.
Step 5: Set display order
Determine the order in which fields are displayed within the group:
- Fields are arranged based on their Display Order value.
- If multiple fields have the same Display Order, they will be arranged alphabetically by their Field Key.
Step 6: Click Save.
- Click Save to finalize the Field Group configuration.