Steps to auto fill with OCR.
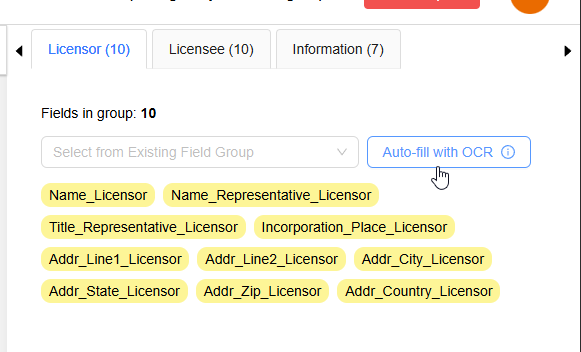
Step 1: Click Auto-fill with OCR at the Group you want to use to open the Upload documents pop-up.
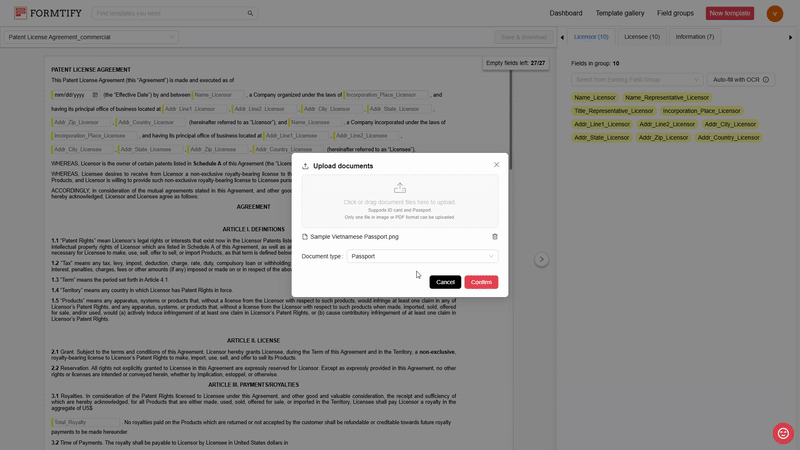
Step 2: Upload the document and choose the document type.
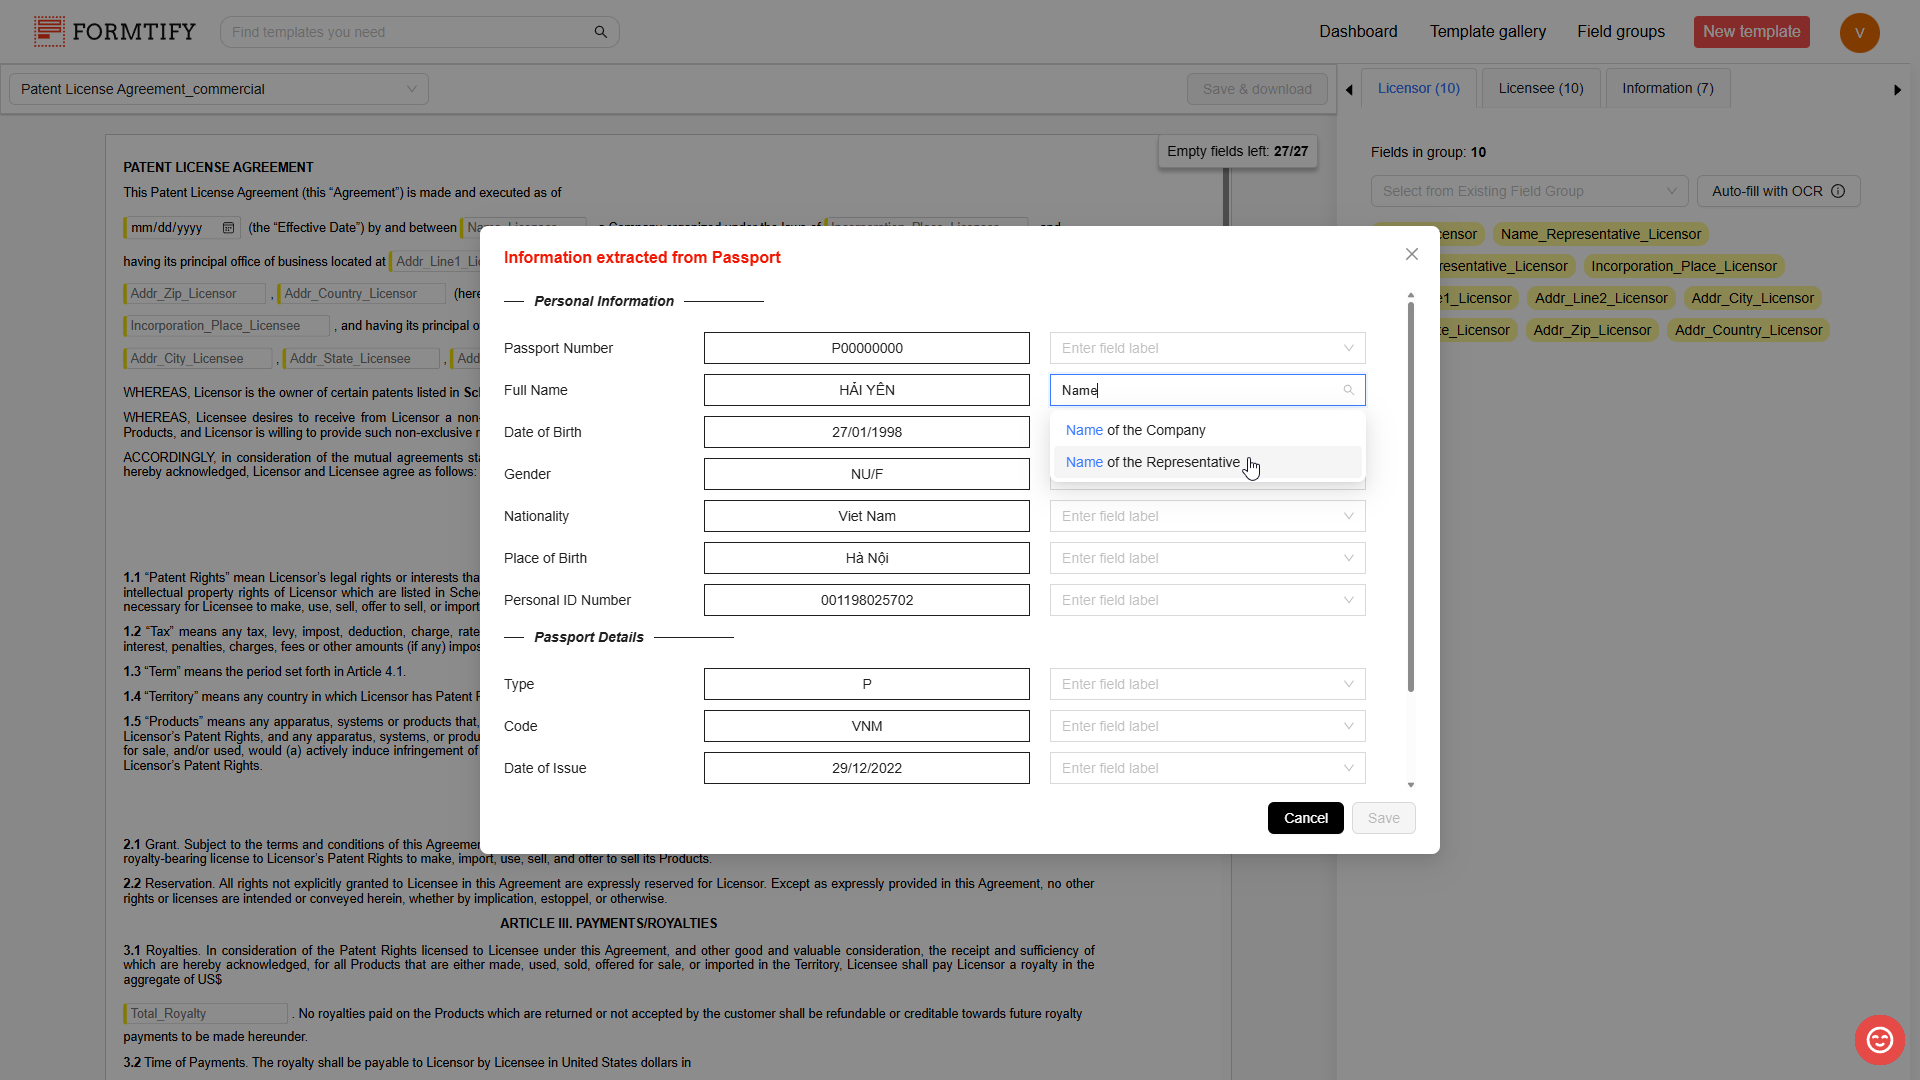
Step 3: Set Up OCR Field Mapping (If Not Configured Yet)
If this is your first time using OCR auto-fill, you’ll need to map the extracted data to the correct fields in your template.
- The system will display a list of extracted data from your uploaded document (e.g., passport, ID).
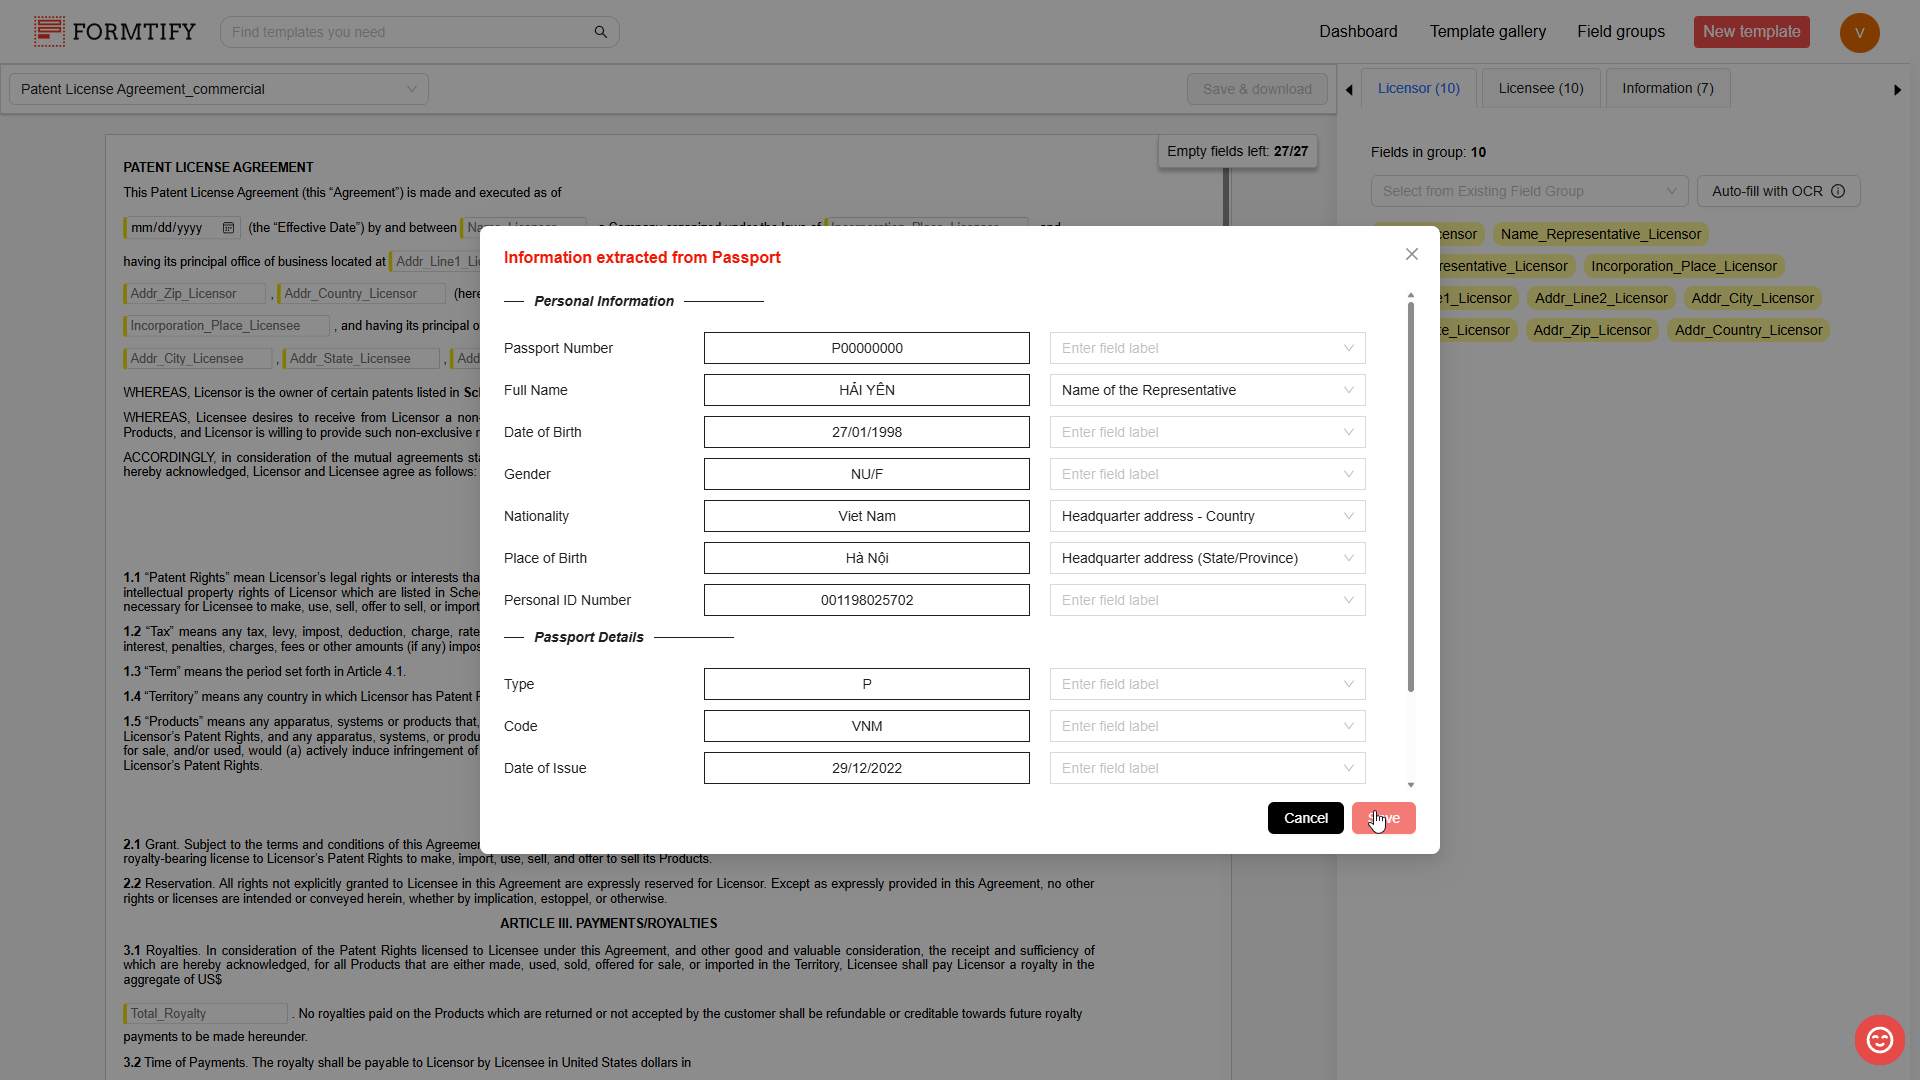
- You’ll need to manually assign each piece of extracted data to the corresponding fields in your Template Set Group or Field Group.
- Once you’ve mapped all fields, click Save.
Why Do Some Fields Look Different?
- The OCR field mapping window displays all fields in the Template Set, meaning it includes fields from multiple templates within the set.
- The Field Grouping panel on the right side only shows fields for the current template you are working on.
- Even if a field doesn’t appear in the Field Grouping panel, it may still be part of the template set and needs mapping.
Why Map the Entire Template Set?
- The mapping setup applies to the entire Template Set, not just the template you’re currently viewing.
- This means the same OCR extraction rules can be used across all templates within the set, ensuring consistency and reducing the need for duplicate mapping efforts.
- Once mapping is complete, OCR will automatically fill in fields across any template in the set that shares the same field keys.
After completing this setup, the system will remember your mappings and automatically apply them in the future, making the document creation process faster and more efficient.
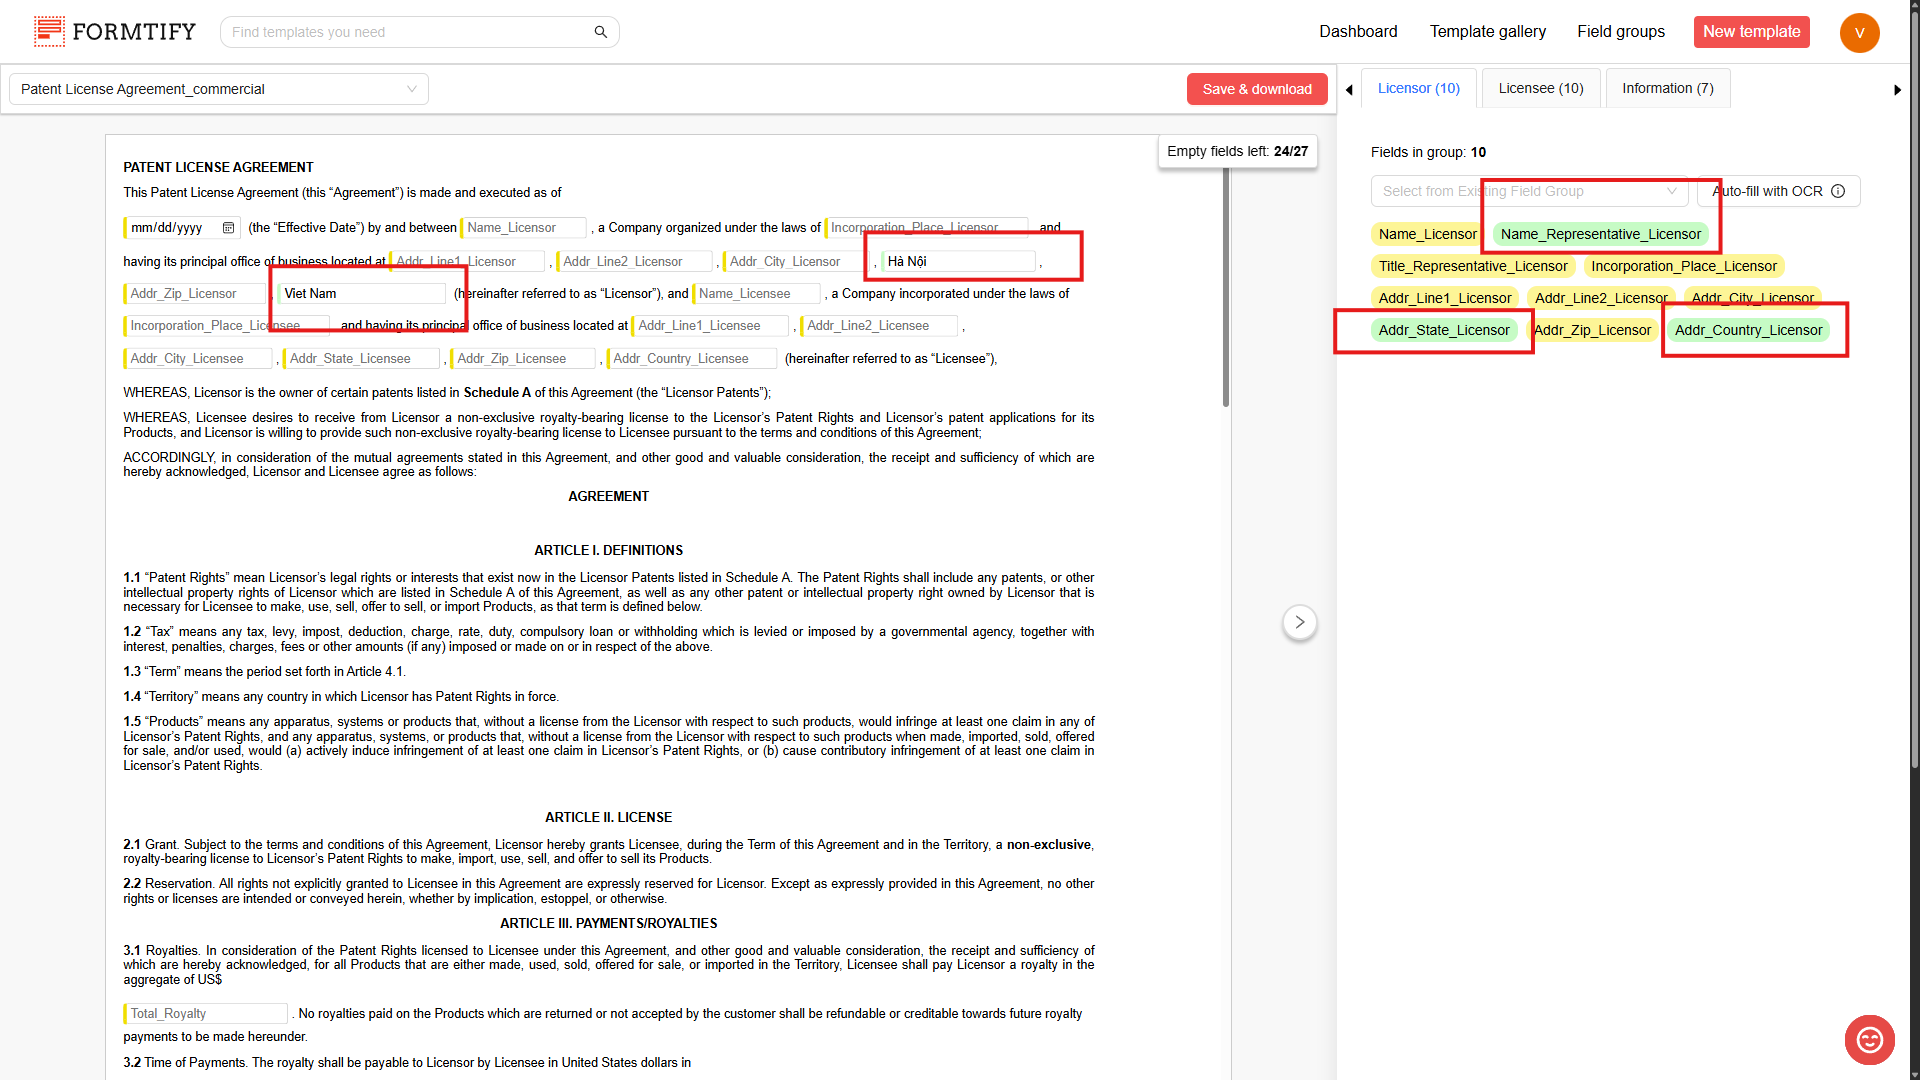
Step 4: The information extracted will be filled into the selected fields.