Introduction
In the previous article, you learned what a template is and why it’s helpful for automating your document workflow.
This guide shows you how to convert a regular .docx document into a template that works with Formtify, using field keys. You’ll learn how to identify dynamic parts of your document and replace them with smart placeholders, so they can be automatically filled in later.
You don’t need to know how to code — just follow a few simple steps.
Step 1: Open Your Existing Document
Start with any Word document you already use — such as a contract, form, or declaration. Read through the content and identify which parts change depending on the person or case.
Typical examples include:
- Full names
- Date of birth, ID numbers
- Email addresses and phone numbers
- Company or job information
- Address details
- Contract dates or issued locations
Step 2: Replace Changing Text with Field Keys
Anywhere you find information that might vary, replace it with a field key.
A field key is a simple label written inside curly braces.
Examples:
Replace “John Doe” with {full_name}
Replace “01/01/1990” with {date_of_birth}
Replace “Tech Solutions Inc.” with {workplace}
Replace “john.doe@example.com” with {email}
There are no strict naming rules, but to keep things clear and consistent, we recommend using lowercase letters and underscores. For example:
{phone_number}, {company_name}, {number_of_children}
Each field key should represent one specific piece of information.
If your template has more than a few fields, take a minute to structure your field keys using layered names like:
{Customer.Name.Full}, {Invoice.Amount.Total}, {Company.Address.HeadOffice}
To learn the best way to name field keys, see Best Practices for Creating Templates
Step 3: Save Your Template
After you’ve added field keys to all the dynamic areas:
- Re-read your document to make sure everything still makes sense
- Double-check that all personal/sample data has been removed
- Make sure all field keys are written inside curly braces
- Save your file as a
.docxformat
This file is now ready to upload to Formtify and will work as a reusable template for future documents.
Formtify currently supports .docx files only. Do not upload PDFs, scanned images, or Google Docs links.
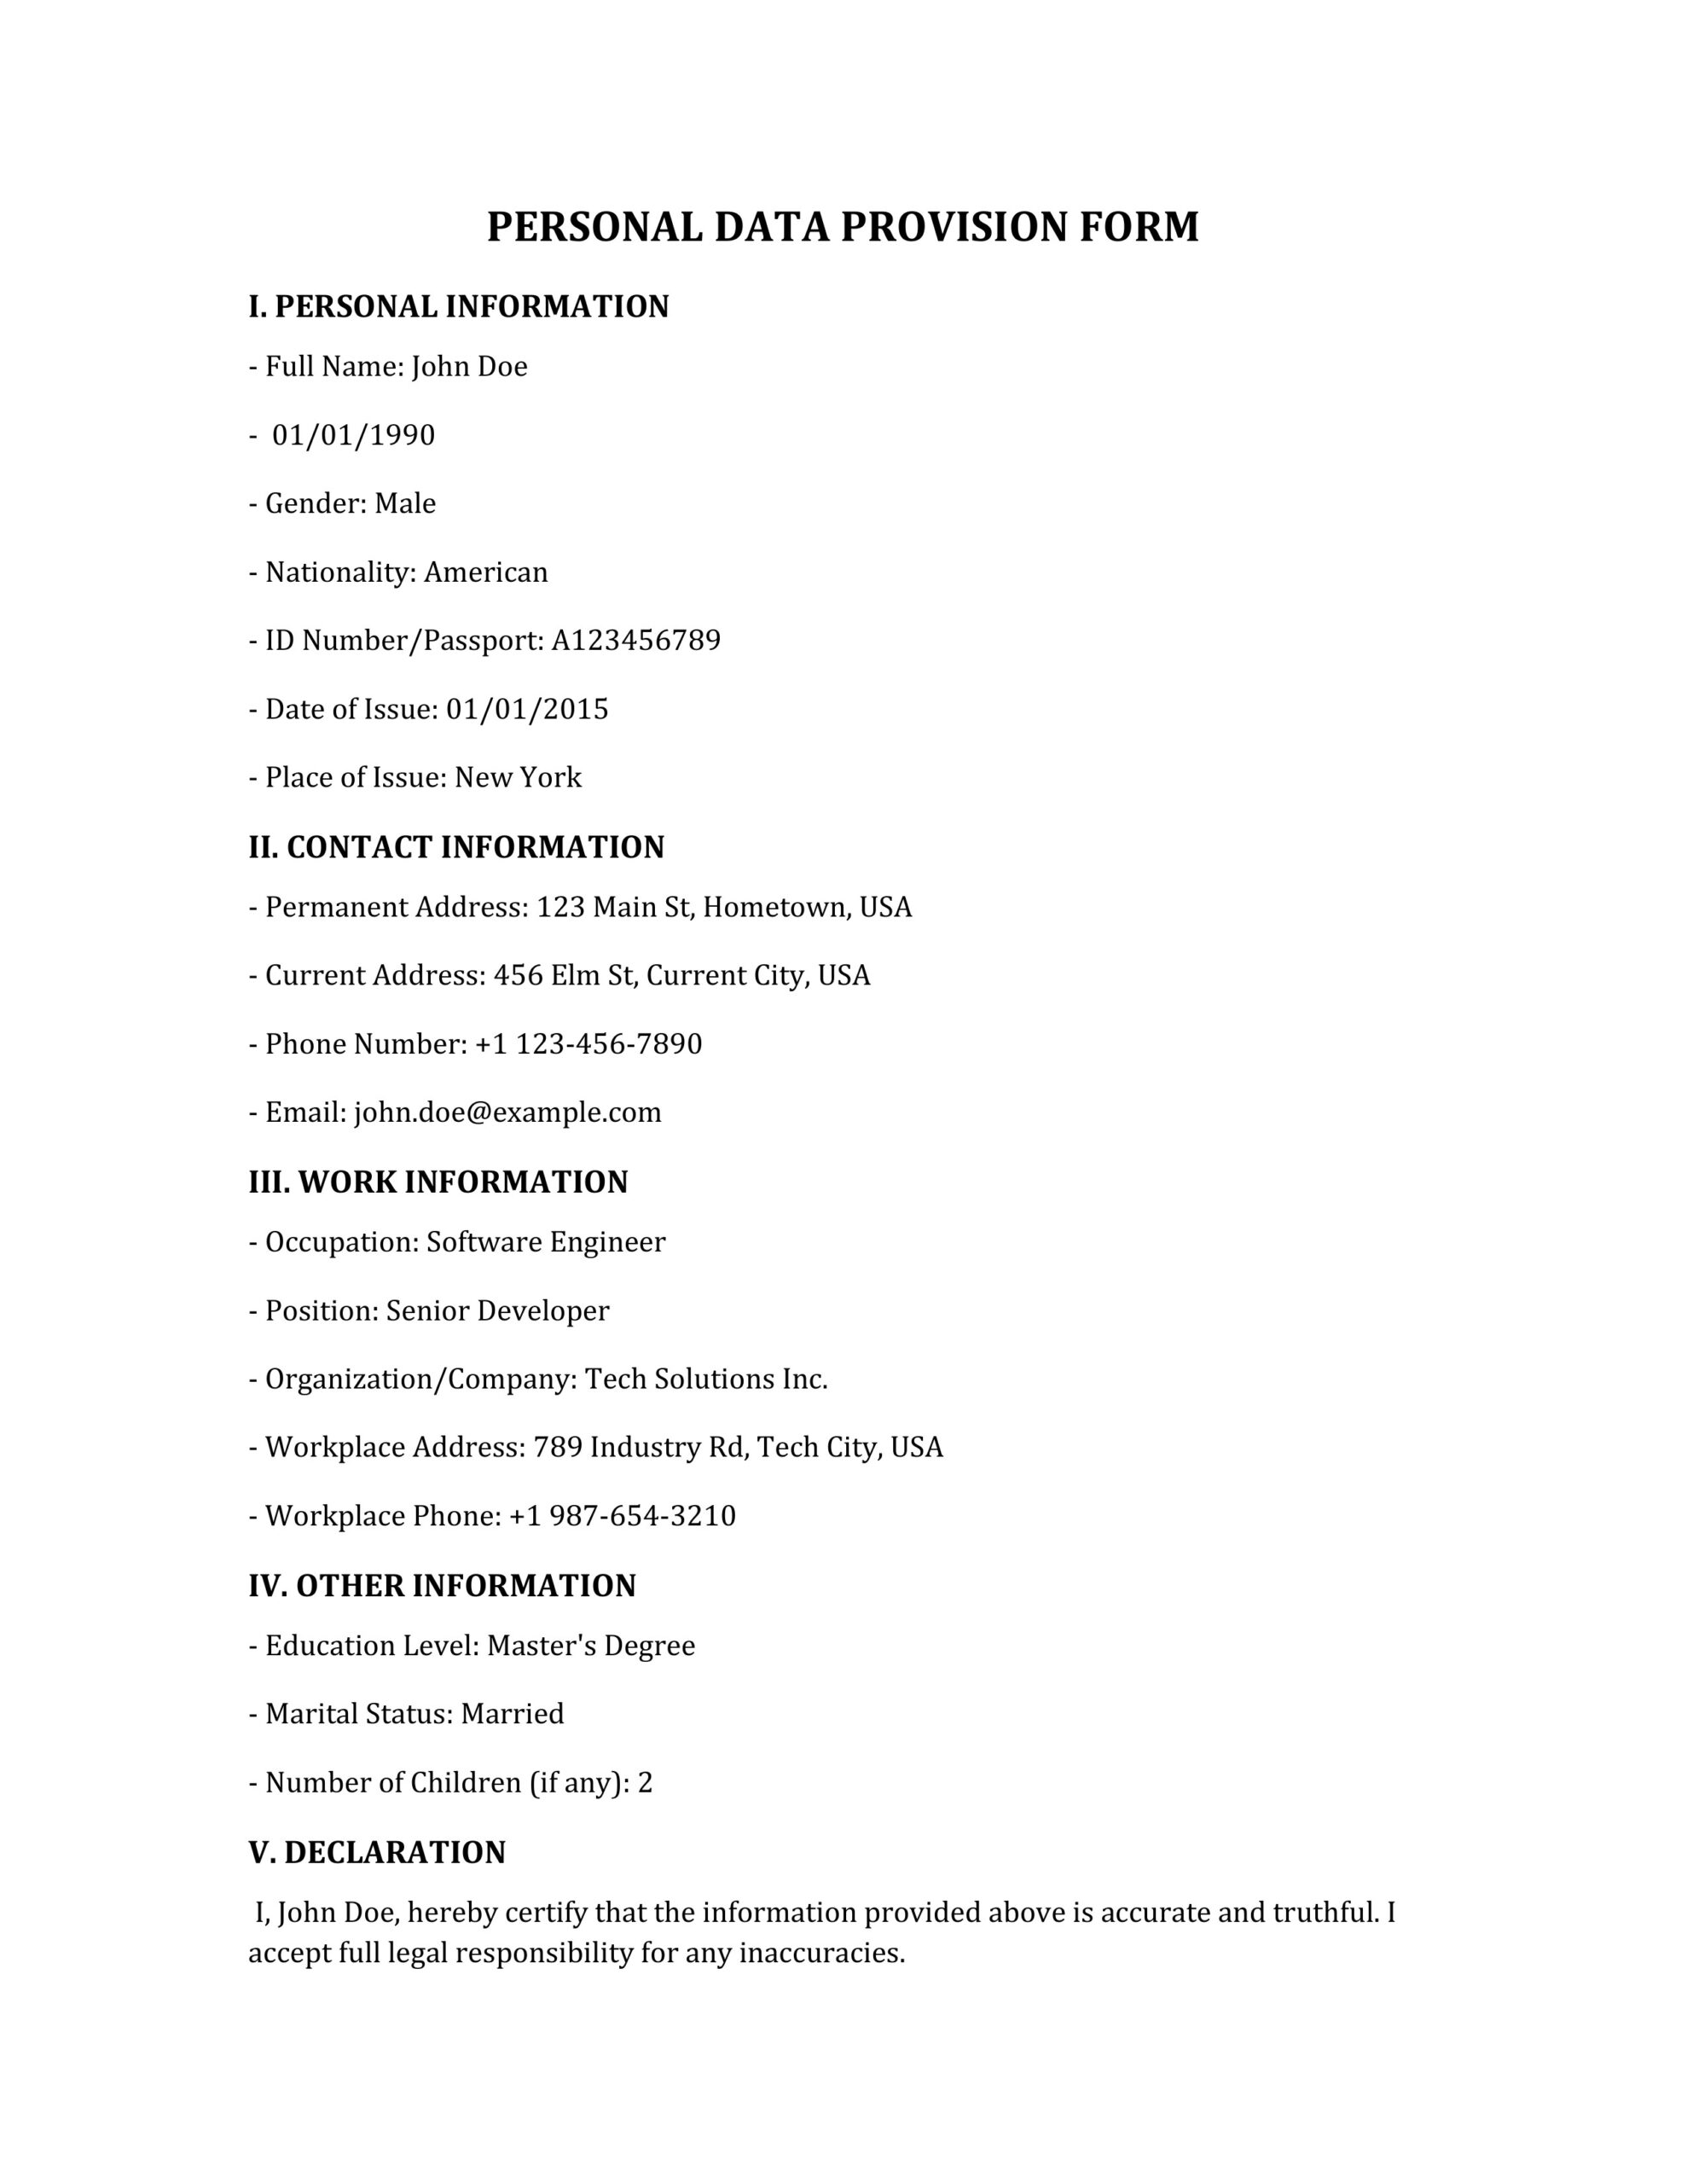
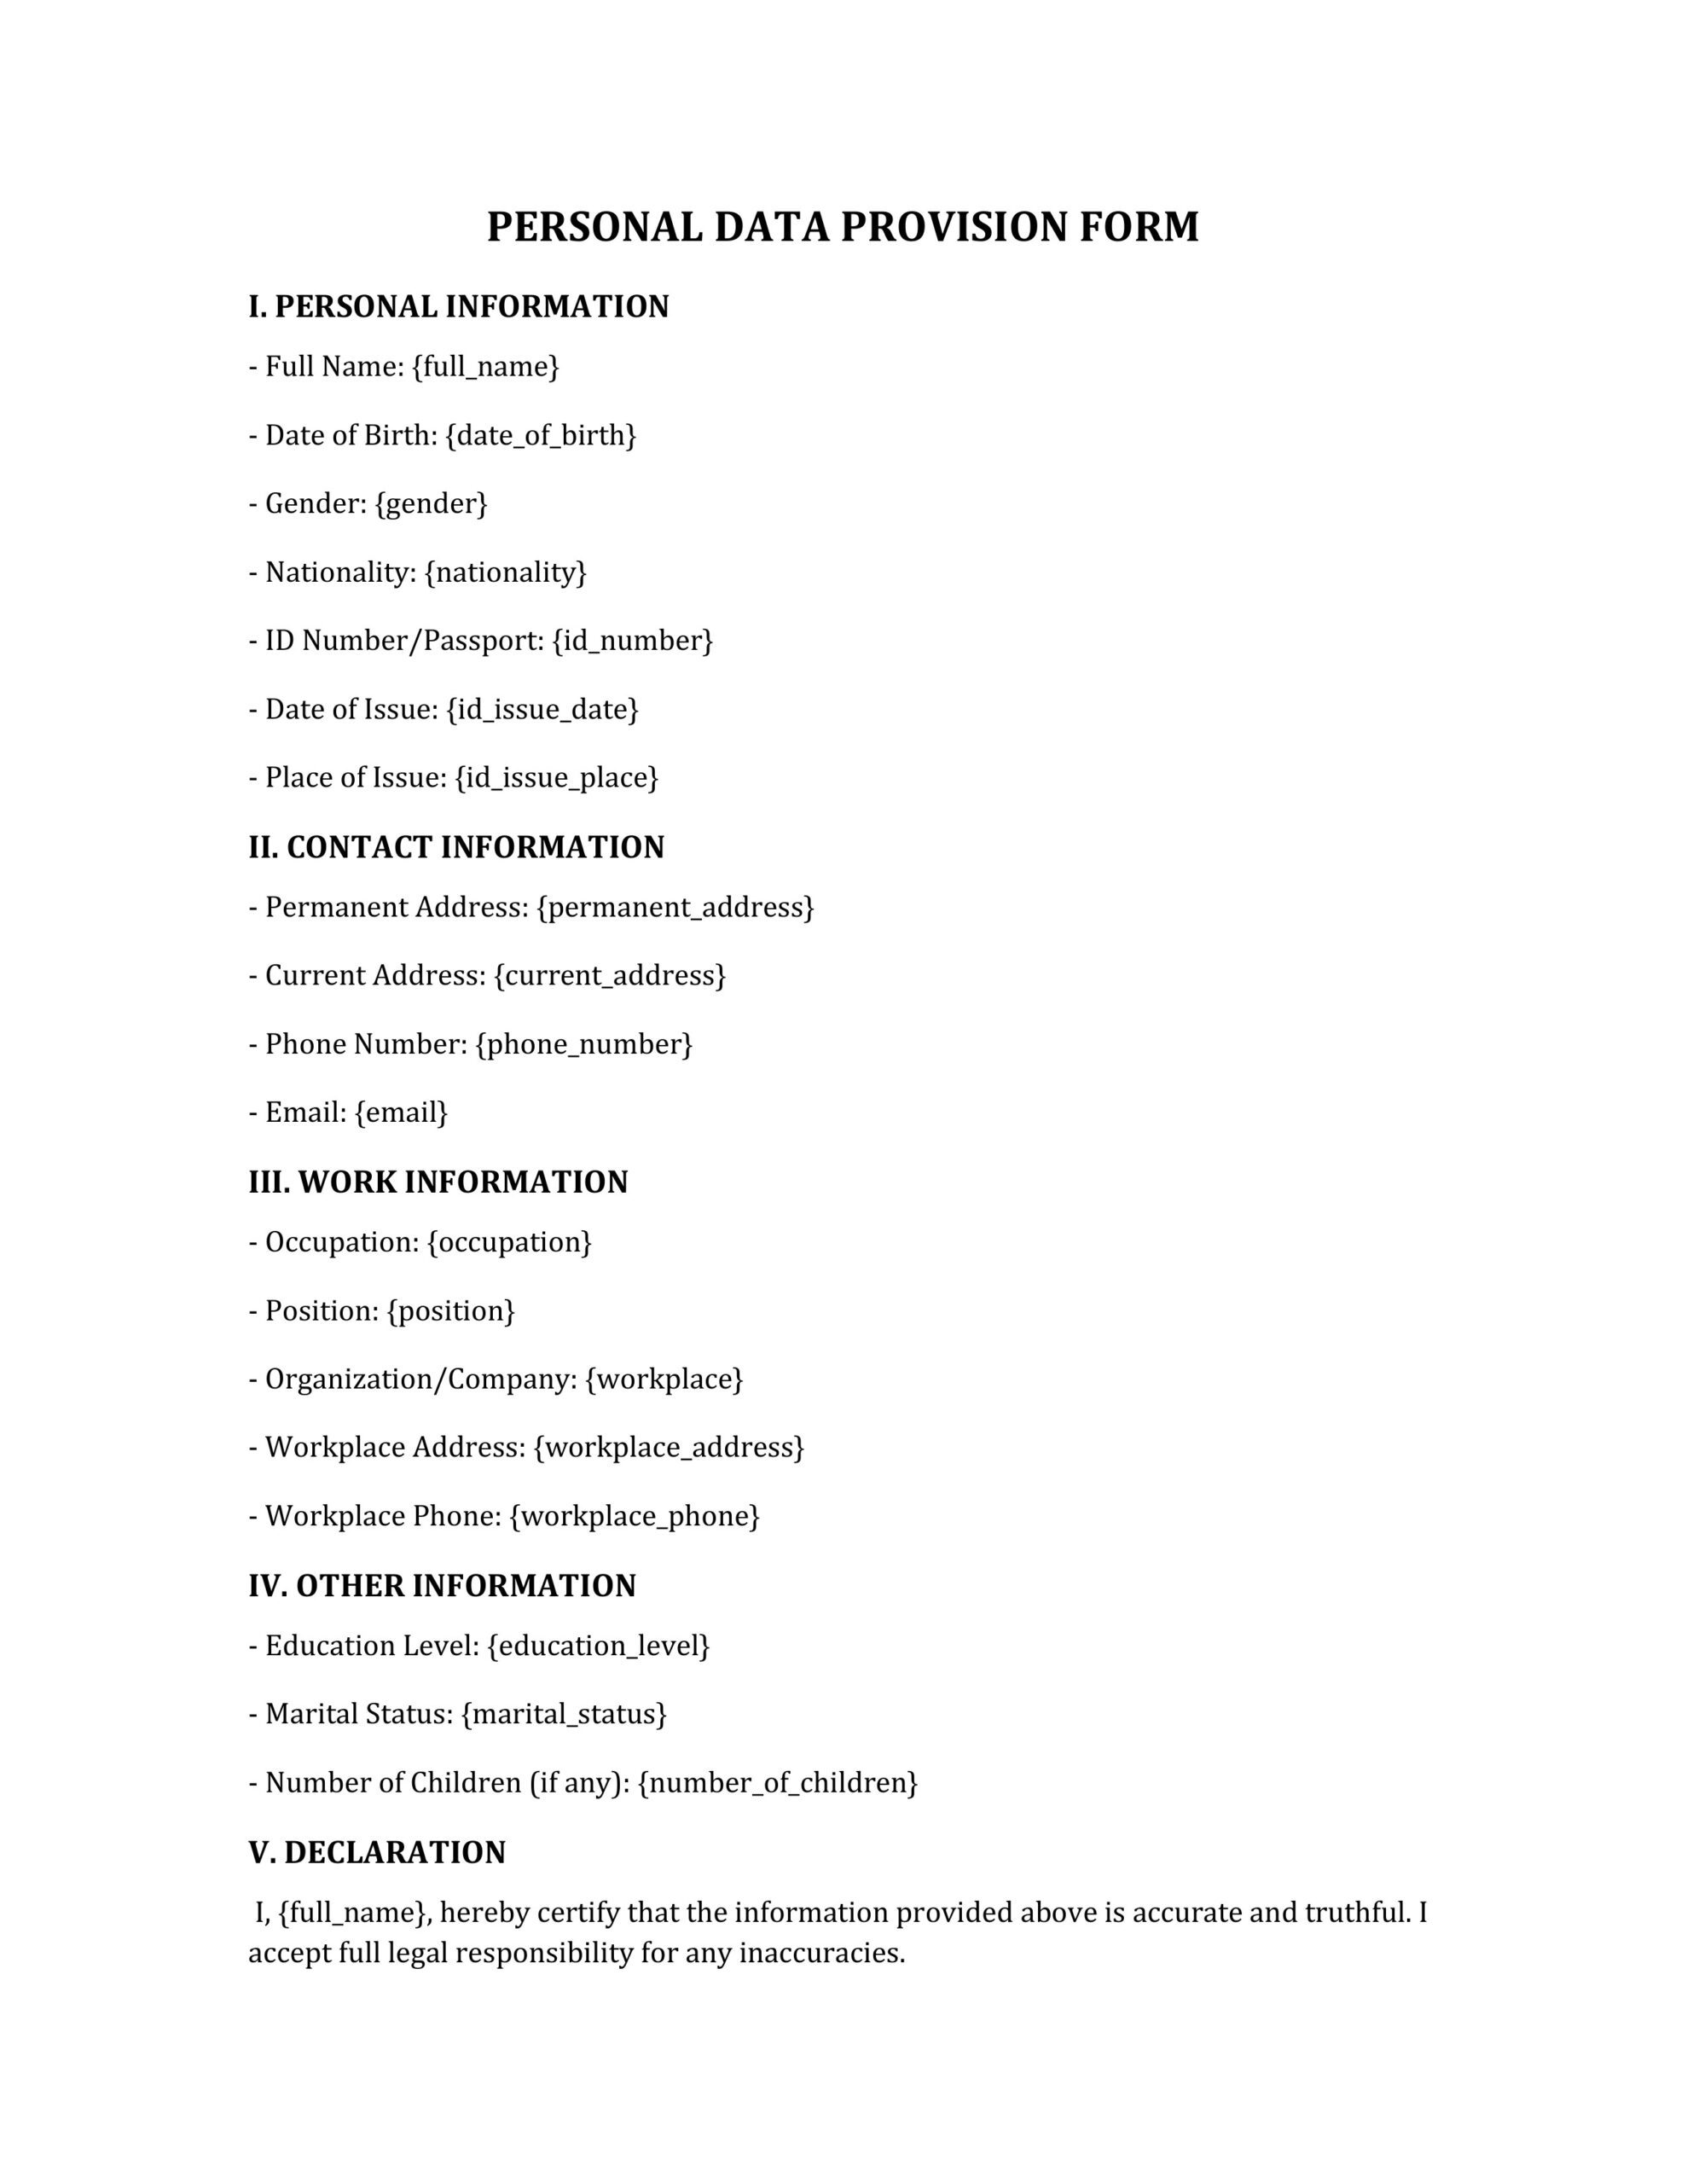
Example: Template vs. Completed Document
Let’s take a look at a real example.
You’ll see two versions of the same document:
Completed version: These placeholders have been replaced with real values like John Doe, john.doe@example.com, and +1 987-654-3210.
Template version: Contains field keys like {full_name}, {email}, {workplace_phone}


By preparing your document this way, you can generate personalized versions of it for different people in seconds — no manual editing needed.
Common Mistakes to Avoid
1. Missing curly braces
Wrong: full_name, email, company
Correct: {full_name}, {email}, {company}
Without curly braces, Formtify won’t recognize it as a field key.
2. Using the same field key for different values
Wrong: {name} used for both client and representative
Correct: {client_name}, {representative_name}
Using the same key means both places will show the same value, even if they should be different.
3. Forgetting to remove real data
Wrong: Full Name: John Doe, Email: {email}
Correct: Full Name: {full_name}, Email: {email}
Formtify will only replace field keys. Any leftover text like “John Doe” will stay in every document.
What’s Next?
Now that your template is ready, the next step is to upload it into Formtify. You’ll be able to preview the fields, map your data, and start generating documents effortlessly.
The next guide will walk you through the upload process step by step.
