Introduction.
Creating documents in Formtify is simple—just fill in the required fields within your template, and your document will be ready in no time! This guide will show you how.
Access the create document fill page.
There are several ways to open the Create Document page, depending on where you are in the system:
- Click the three dots menu at the end of the template name row on the My Template page → click Create document.
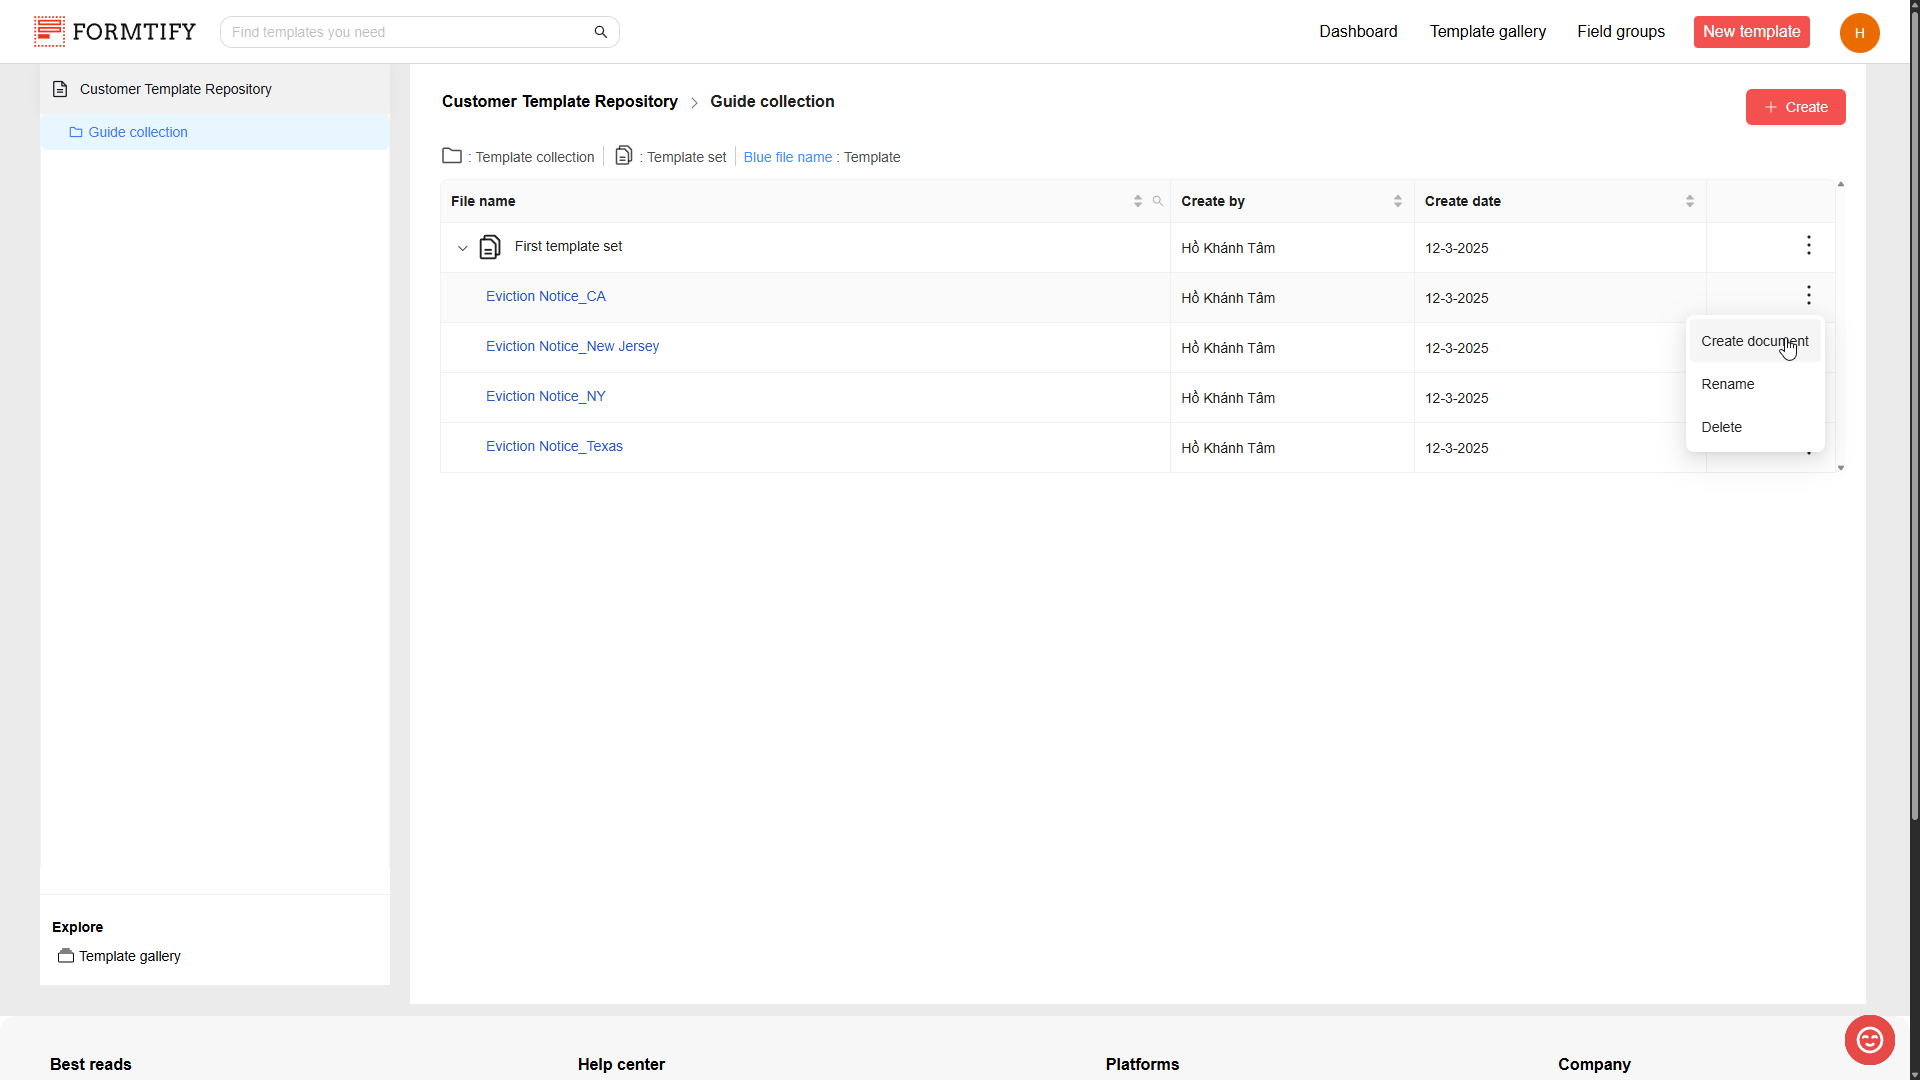
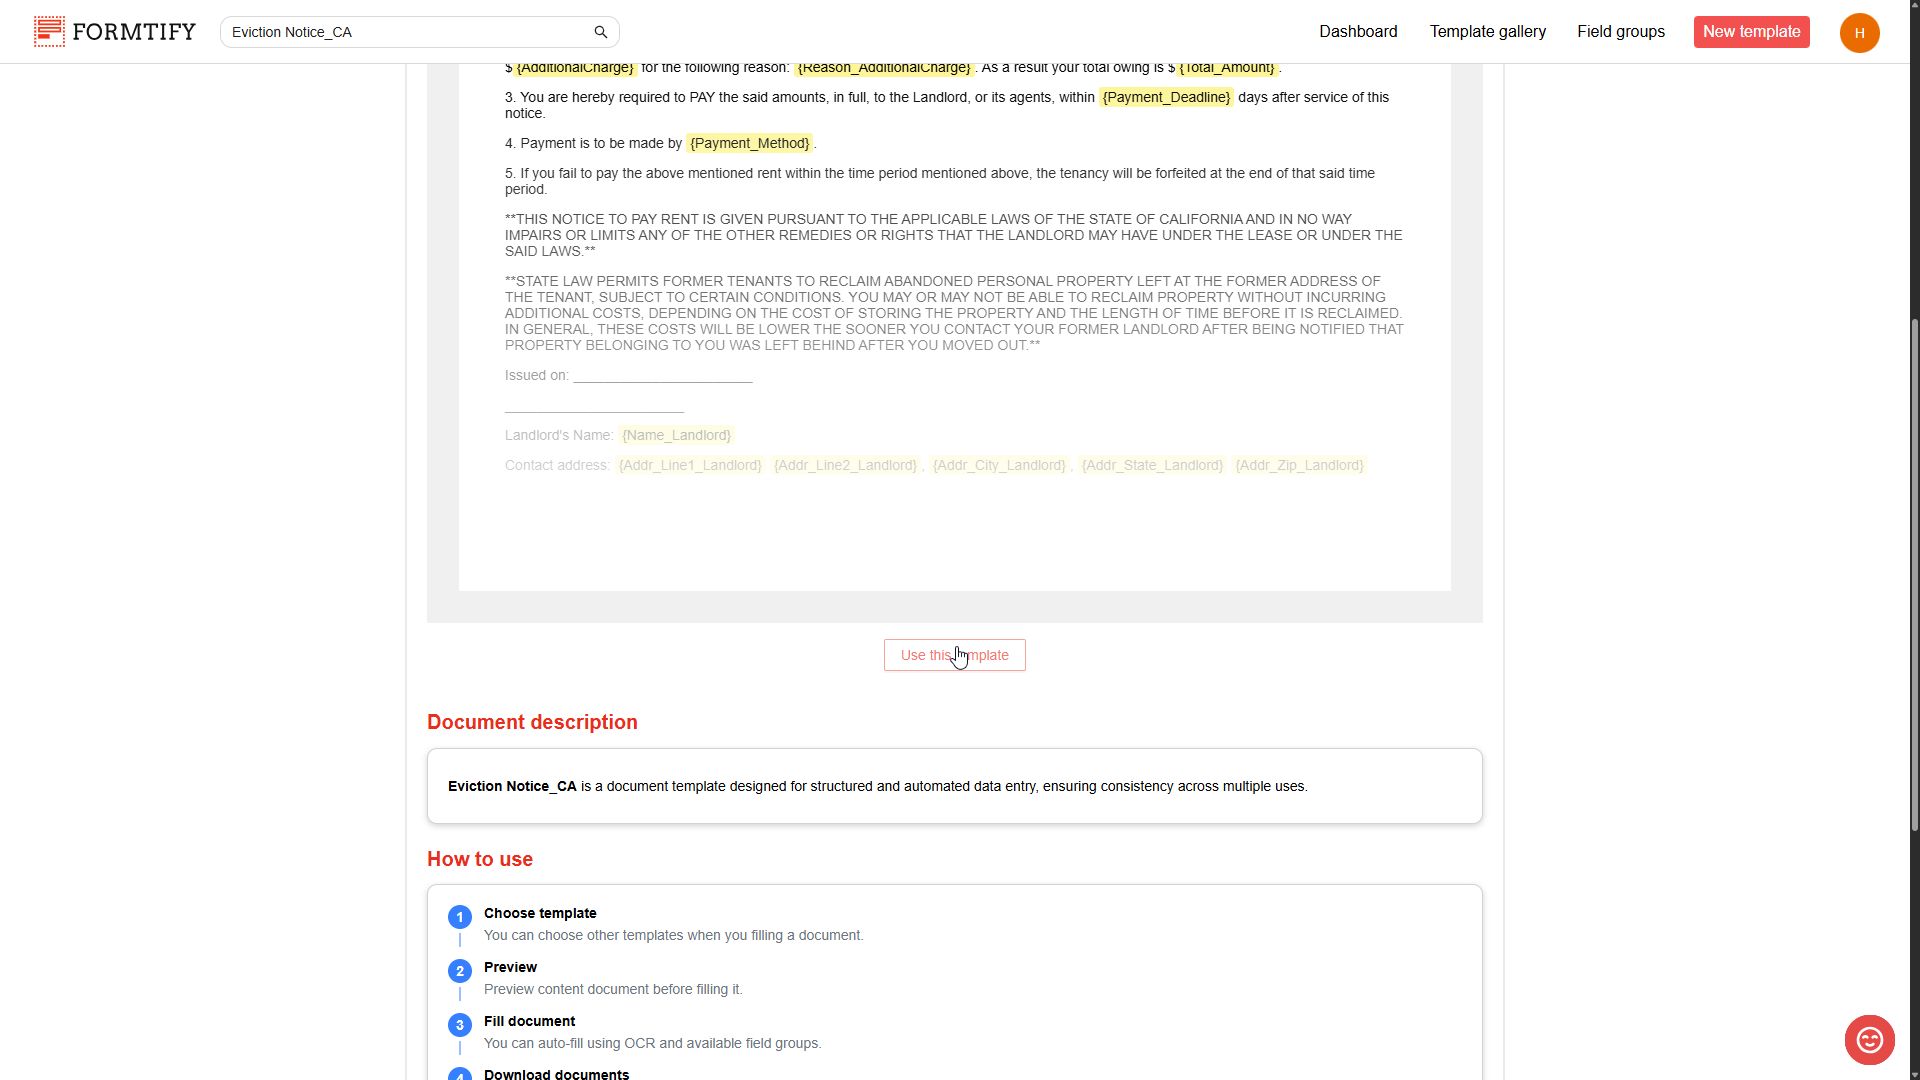
- Click the Use this template button on the preview page.

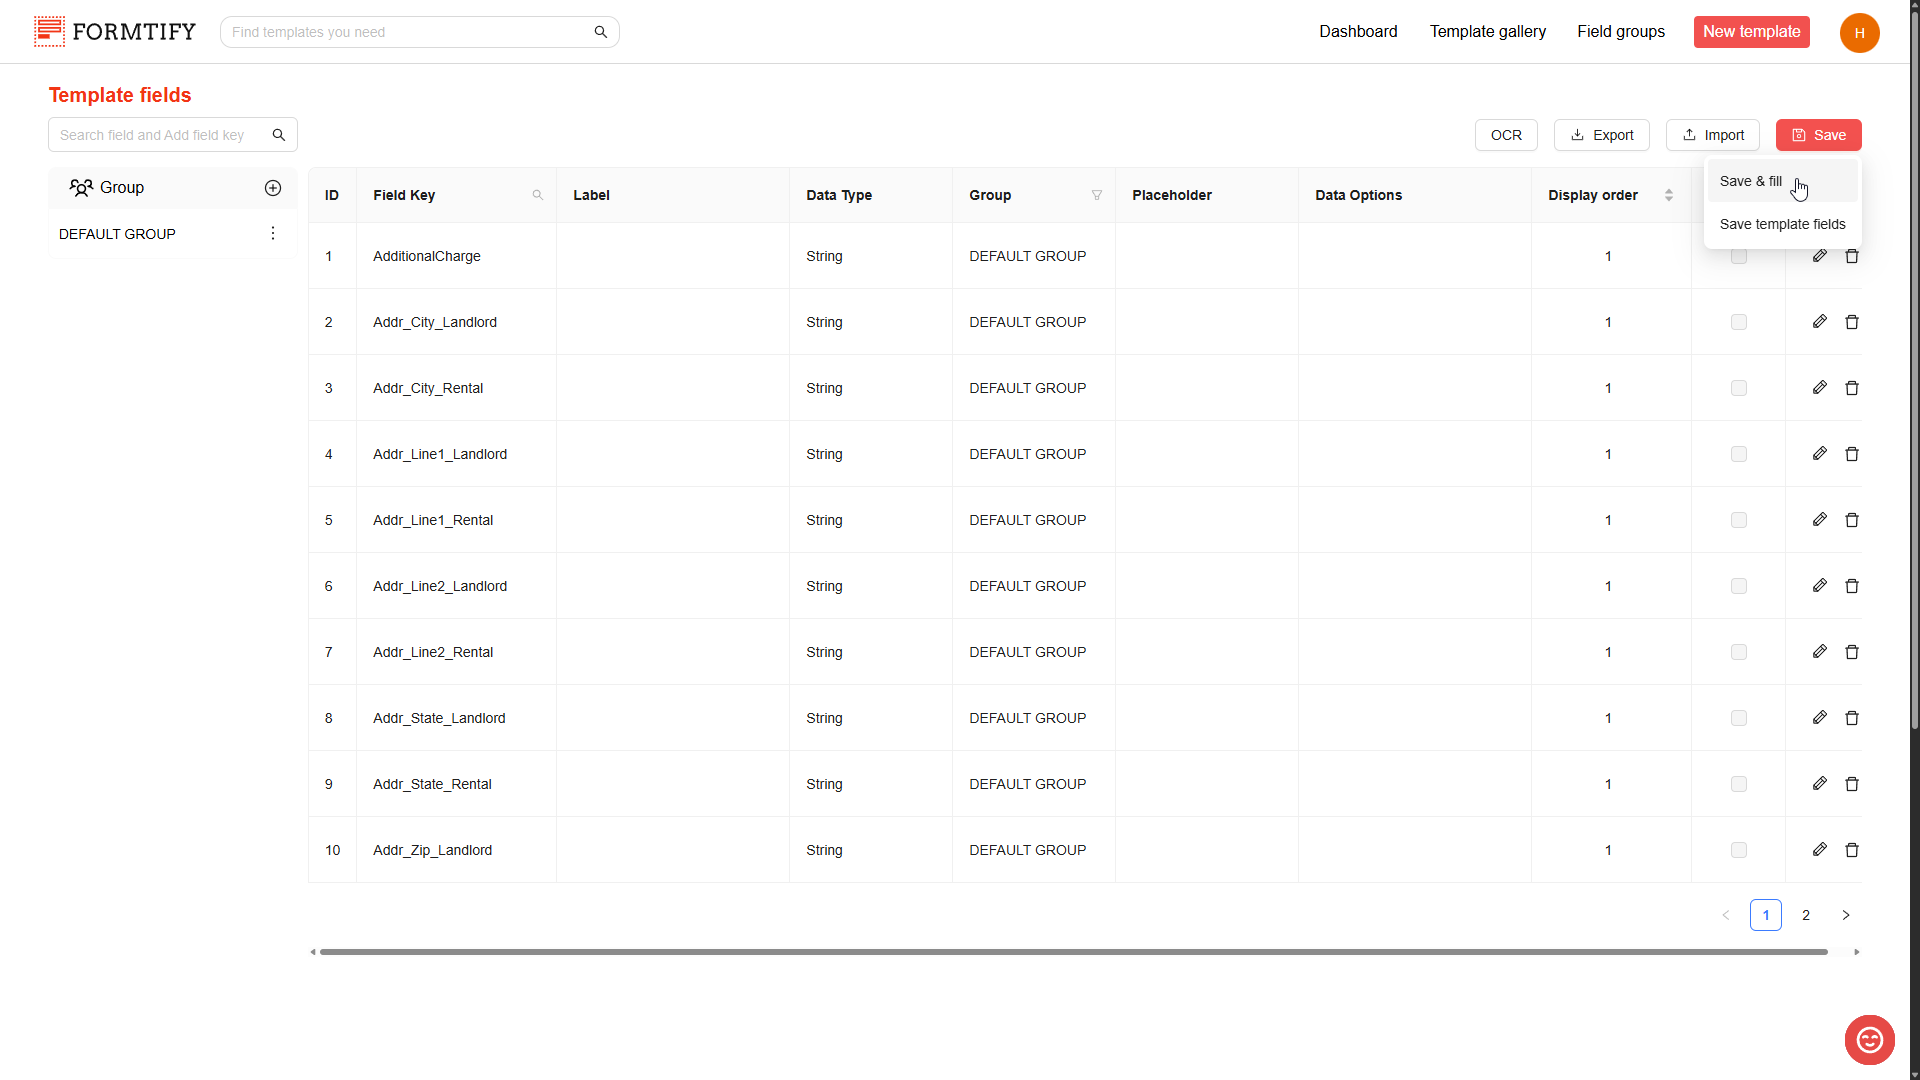
- Click Save → Save & Fill on the Template fields page.
How to create a document?
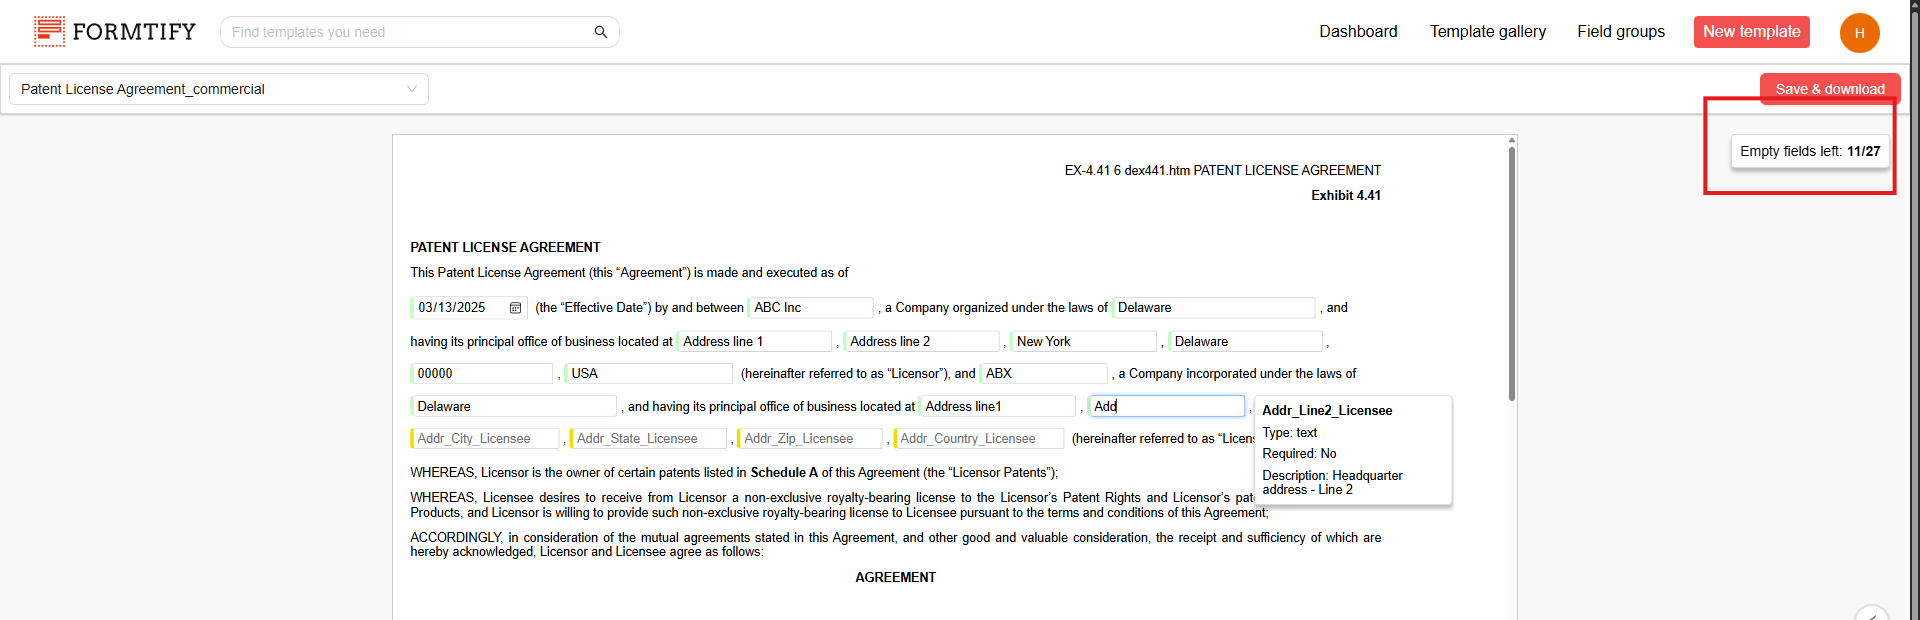
Creating a document with templates is easy. You simply need to fill in the Fields directly on the Template.
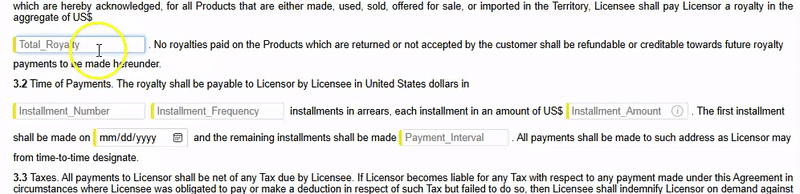
Fields are placed based on the position of the field key on the template, and a colored line on the left indicates their state.
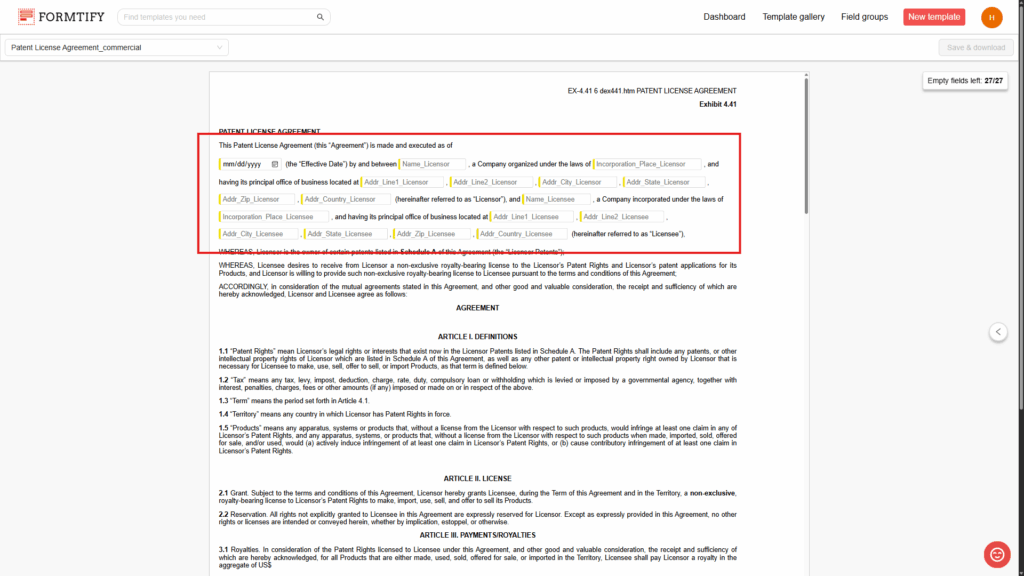
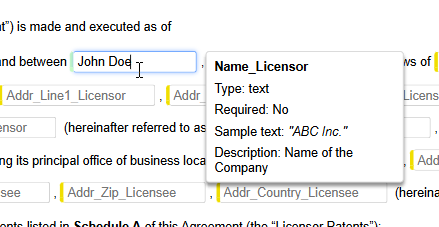
When you click the Field to start filling, a Field properties card will appear.
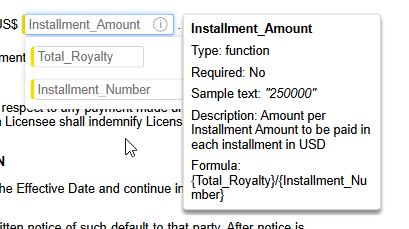
The Field properties card will show properties of a Field, including: Field key, Type of field, Required (when a Field is required, you must fill it to create a document), Sample text, Description, Formula (Only appears for Function, Drop-down, Radio Field).
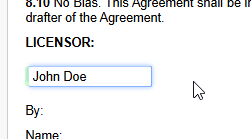
When you fill a Field, the color line at the left will change to green to indicate that the Field has an input value.
A Field can appear multiple times in a Template, but you only need to fill it once. All other instances of the same Field will automatically update with the same input value.
Not all Fields need to be filled manually. A Function field is auto-populated when all the Fields in the Formula of the Function field have an input value.
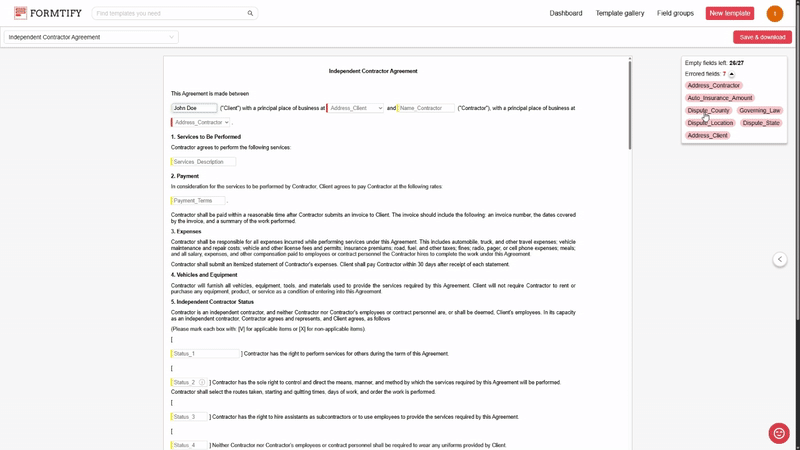
The floating card on the top left corner will show how many empty Fields left.
When you finish filling you can click Save & Download to create your document. (You need to fill at least 1 Field to enable the button)
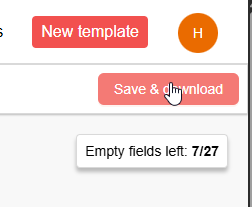
When you click Save & download, Formtify will validate all the Fields on the Template.
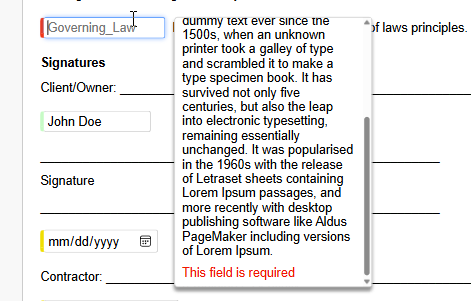
If there are any incorrect Fields, they will be shown in the floating card, and the color line of these Fields will be changed to red.
Additionally, the validation message will also appear in the bottom of the Field properties card.
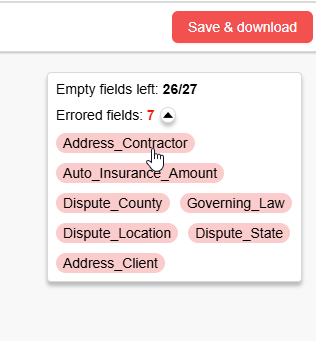
You can quickly navigate to an error Field by clicking the red pill that has the Field key on it.
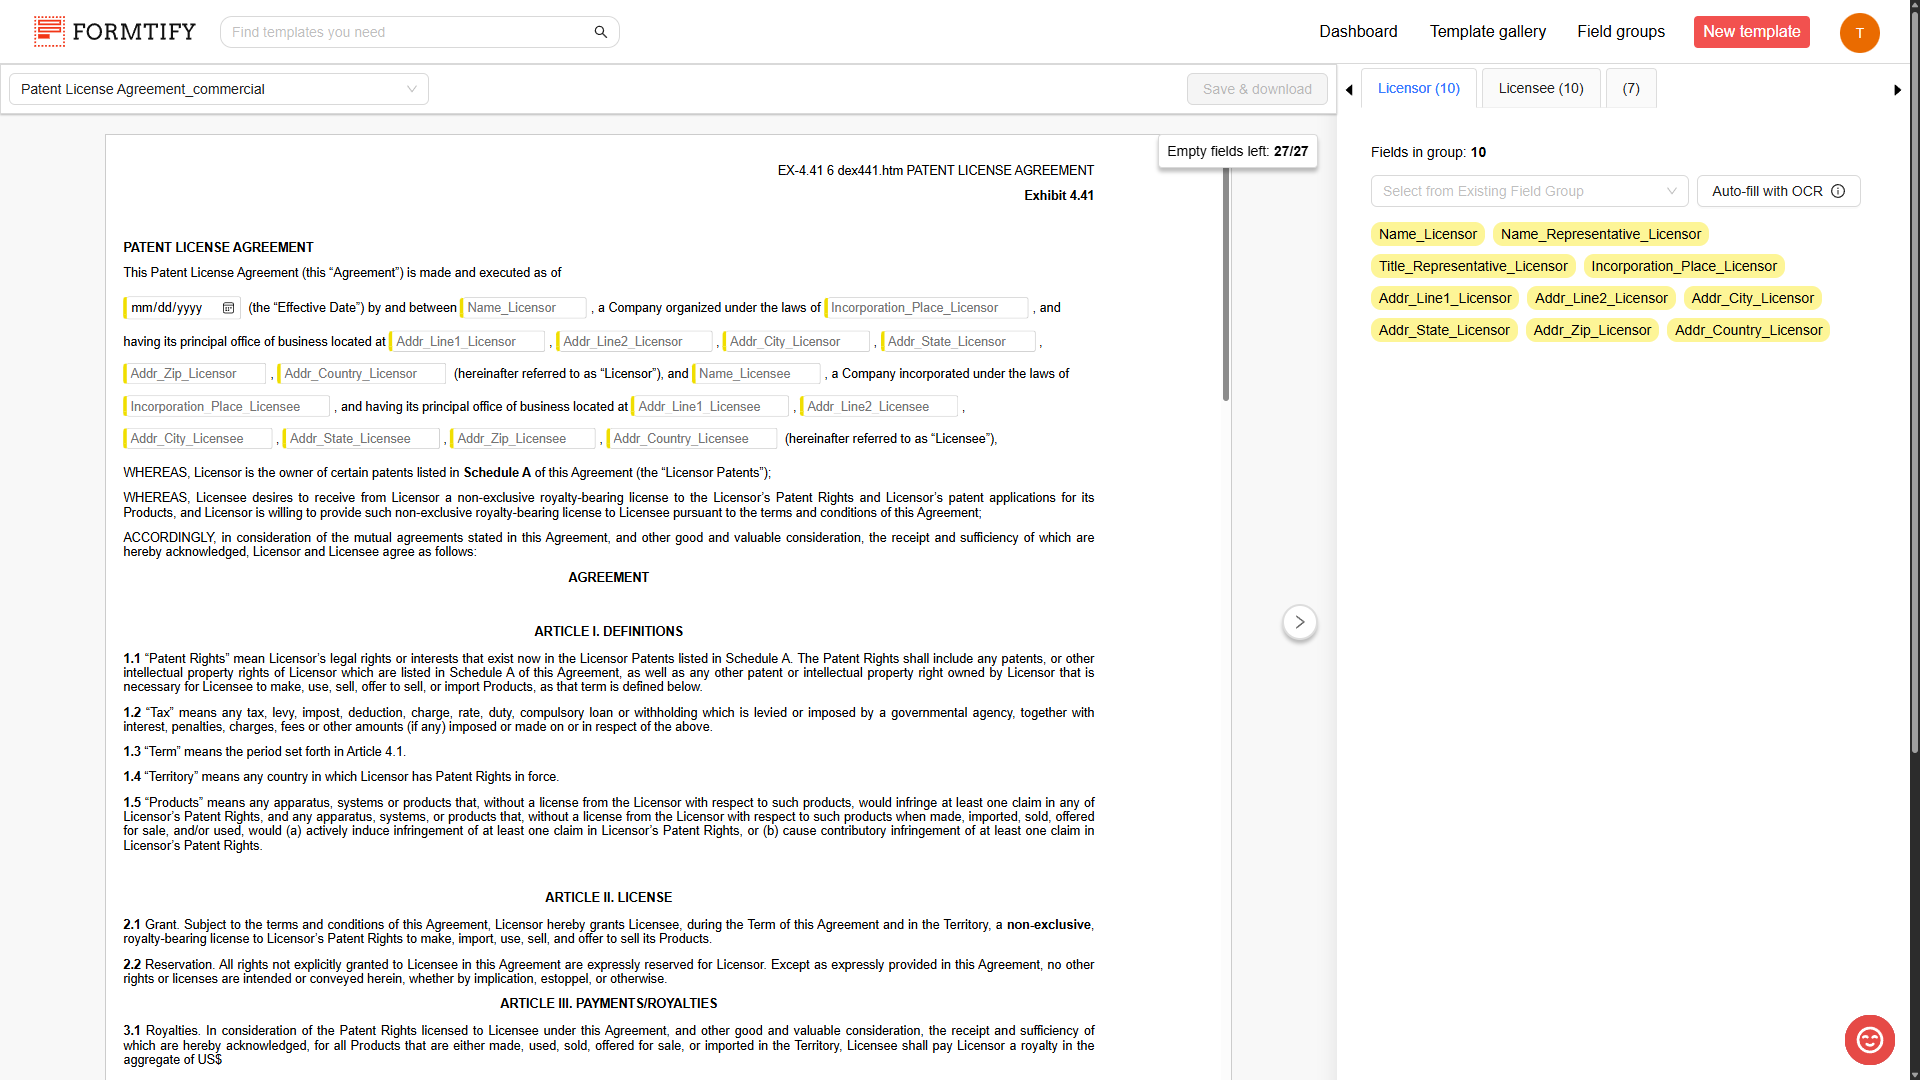
Field Grouping panel for auto-fill.
What is the Field Grouping panel?
- The Field Grouping panel on the right side of the screen shows all the fields in your template, organized into groups.
- This feature is designed to make auto-fill more efficient, helping you quickly populate documents with accurate information.
Why Do Fields Need to Be in a Group?
Each Field Group represents an entity in your template, such as a person, company, or organization. Grouping fields together ensures that all related information stays connected and can be filled in easily.
For example, if a contract includes details about both a Licensor and a Licensee. Each of these should have its own Field Group containing relevant Fields like name, address, and incorporation details.
Keeping these fields grouped allows for structured and accurate data entry.
How Does Auto-Fill Work?
Auto-fill helps you quickly enter data in two ways:
- Field Group Data – If you’ve saved details about an entity before (like a customer or employee), you can reuse that data to fill in all related fields automatically. (Learn more about it in Auto-fill From Field Group Data to Template)
- OCR (Optical Character Recognition) – Extracts information from scanned documents, such as passports, national IDs,…. and auto-fills the matching fields. (Learn more about it in Auto-fill From Field Group Data to Template)
By grouping fields properly, auto-fill becomes faster, smarter, and more accurate, saving you time and reducing errors.
Quick Navigation for Easy Editing.
The Field Grouping panel isn’t just for auto-fill—it also helps you navigate your template. Simply click on a field key pill in the panel, and it will highlight the corresponding field in the document, making it easy to locate and edit.
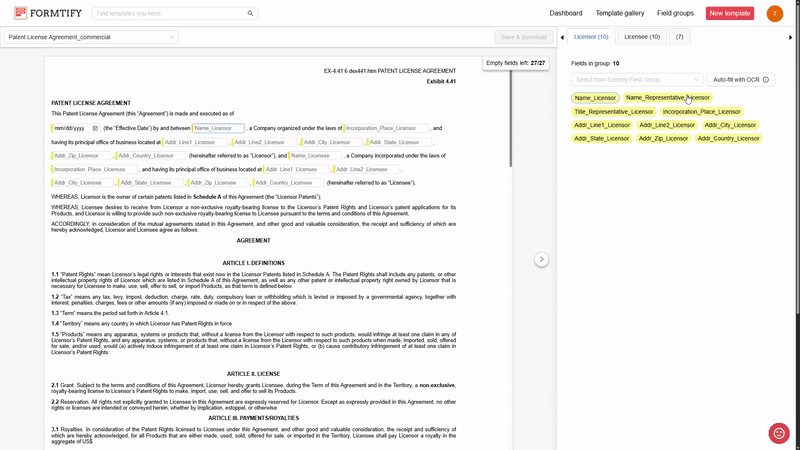
Additionally, when a Field has an input value, its Field key pill will change color to green, indicating that the Field is filled. This visual cue helps you quickly identify which fields still need input and which are already completed.